How to – Vicibox 9 Scratch Install: OpenSuse 15.1 – Lightsail instance

CyburDial Admin Page

How to – Vicibox 9 Scratch Install: OpenSuse 15.1

Here are the steps I used to do a vicibox 9 scratch install on Leap 15.1

###This is going to help you install Vicidial 9.0.2 on OpenSuSE 15.1 on an Amazon AWS Lightsail Virtual Server###

###First open an account on AWS and create an instance on Lightsail, choose linux, os only, opensuse.

###once its started, click on manage, then go to networking and create a static ip, attach it.

###SSH to the server, you will need to have a ssh key to do this, download the .pem file from amazon and use puttygen to convert it, ###instructions are there in lightsail

###Now is where it starts and i will just be telling you the commands to run


  • sudo -i
  • zypper install kernel*
  • press # 2 for all 4 choices it gives you
  • zypper ar https://download.opensuse.org/repositories/home:vicidial:asterisk-13/openSUSE_Leap_15.1/home:vicidial:asterisk-13.repo
  • zypper ref
  • zypper up
  • zypper install asterisk
  • reboot
  • sed -i ‘s/SELINUX=enforcing/SELINUX=disabled/g’ /etc/selinux/semanage.conf
sudo -i 
zypper install kernel* 
press # 2 for all 4 choices it gives you 
zypper ar https://download.opensuse.org/repositories/home:vicidial:asterisk-13/openSUSE_Leap_15.1/home:vicidial:asterisk-13.repo
zypper ar https://download.opensuse.org/repositories/home:/vicidial/openSUSE_Leap_15.1/home:vicidial.repo
zypper ref
zypper up 
zypper install asterisk 
reboot 
sed -i 's/SELINUX=enforcing/SELINUX=disabled/g' /etc/selinux/semanage.conf

***Add Swap File

  • mkdir -p /var/lib/swap
  • dd if=/dev/zero of=/var/lib/swap/swapfile bs=1M count=1024
  • mkswap /var/lib/swap/swapfile
  • swapon /var/lib/swap/swapfile
  • cat /proc/swaps

***Add Swap into startup

  • vim /etc/fstab
  • Type “i”
  • Add a new line below what’s there
  • COPY whats in quotes – “/var/lib/swap/swapfile swap swap defaults 0 0” Press CNTL+C
  • Type what’s in quotes – “:wq”
  • Press Enter

###installing dependencies

  • zypper install make patch gcc gcc-c++ subversion php php-devel php-gd gd-devel php-mbstring php-mcrypt php-imap php-ldap php-mysql php-odbc php-pear php-xml php-xmlrpc curl curl-devel perl-libwww-perl ImageMagick libxml2 libxml2-devel httpd libpcap libpcap-devel libnet ncurses ncurses-devel screen mysql-devel ntp mutt wget nano unzip sipsak sox libuuid-devel
  • zypper install sqlite3-devel
  • zypper install mariadb-server mariadb
  • zypper install httpd php-common php-pdo mod_ssl perl-DBI perl-DBD-MySQL perl-Digest-HMAC perl-YAML
  • zypper install perl-ExtUtils-ParseXS perl-NetAddr-IP perl-Crypt-SSLeay perl-Curses perl-DBD-Pg perl-Module-ScanDeps perl-Text-CSV perl-HTML-Template perl-IO-Compress perl-Text-Glob perl-Jcode perl-Test-Script perl-Archive-Tar perl-Test-Base perl-OLE-Storage_Lite perl-Archive-Zip perl-Net-Server perl-Convert-ASN1 perl perl-Compress-Raw-Zlib perl-Digest-SHA1 perl-Data-Dumper perl-Error perl-ExtUtils-CBuilder perl-Test-Tester perl-Parse-RecDescent perl-Spiffy perl-IO-Zlib perl-Module-Build perl-HTML-Parser perl-Net-SSLeay perl-Proc-ProcessTable perl-TermReadKey perl-Term-ReadLine-Gnu perl-Digest-SHA perl-Tk perl-Net-SNMP perl-Test-NoWarnings perl-XML-Writer perl-Proc-PID-File perl-Compress-Raw-Bzip2 perl-libwww-perl perl-XML-Parser perl-File-Remove perl-Parse-CPAN-Meta perl-Set-Scalar perl-Probe-Perl perl-File-Which perl-Package-Constants perl-Module-Install perl-File-HomeDir perl-Spreadsheet-ParseExcel perl-Mail-Sendmail
  • zypper install perl-Spreadsheet-XLSX asterisk-perl perl-version perl-Crypt-DES perl-URI perl-Net-Daemon perl-IO-stringy perl-YAML-Tiny perl-HTML-Tagset perl-Socket6 perl-BSD-Resource perl-IPC-Run3 perl-Text-CSV_XS perl-Unicode-Map perl-Net-Telnet perl-PAR-Dist perl-Date-Manip perl-JSON perl-rrdtool lame screen iftop dahdi-linux-devel perl-GD

###preparing for the next part with MCPAN

  • perl -MCPAN -e ‘my $c = “CPAN::HandleConfig”; $c->load(doit => 1, autoconfig => 1); $c->edit(prerequisites_policy => “follow”); $c->edit(build_requires_install_policy => “yes”); $c->commit’
  • cpan -i String::CRC Tk::TableMatrix Net::Address::IP::Local Term::ReadLine::Gnu Spreadsheet::Read Net::Address::IPv4::Local RPM::Specfile Spreadsheet::XLSX Spreadsheet::ReadSXC
  • cpan MD5 Digest::MD5 Digest::SHA1 Bundle::CPAN Pod::Usage Getopt::Long DBI DBD::mysql Net::Telnet Time::HiRes Net::Server Mail::Sendmail Unicode::Map Jcode Spreadsheet::WriteExcel OLE::Storage_Lite Proc::ProcessTable IO::Scalar Scalar::Util Spreadsheet::ParseExcel Archive::Zip Compress::Raw::Zlib Spreadsheet::XLSX Test::Tester Spreadsheet::ReadSXC Text::CSV Test::NoWarnings Text::CSV_PP File::Temp Text::CSV_XS Spreadsheet::Read LWP::UserAgent HTML::Entities HTML::Strip HTML::FormatText HTML::TreeBuilder Switch Time::Local MIME::POP3Client Mail::IMAPClient Mail::Message IO::Socket::SSL readline

###copy and paste this at the same time:

  • cd /usr/bin/
  • curl -LOk http://xrl.us/cpanm
  • chmod +x cpanm
  • cpanm -f File::Which
  • cpanm -f File::HomeDir
  • cpanm CPAN::Meta::Requirements
  • cpanm -f CPAN
  • cpanm YAML
  • cpanm MD5
  • cpanm Digest::MD5
  • cpanm Digest::SHA1
  • cpanm Bundle::CPAN
  • cpanm -f DBD::mysql
  • cpanm Curses
  • cpanm Getopt::Long
  • cpanm Net::Domain
  • cpanm Term::ReadKey
  • cpanm Term::ANSIColor
  • cpanm HTML::FormatText
  • cpanm MIME::Decoder
  • cpanm Mail::POP3Client
  • cpanm User::Identity –force
  • cpanm Mail::Message
  • cpanm Crypt::Eksblowfish::Bcrypt

###lets add mysql(mariadb) and apache2 as services to autostart

  • systemctl start mariadb; systemctl enable mariadb; systemctl start apache2; systemctl enable apache2

###reboot the pc

***Asterisk PERL Module 0.8 Installation – Zypper in asterisk-perl

  • cd /usr/src/
  • wget http://download.vicidial.com/required-apps/asterisk-perl-0.08.tar.gz
  • tar -zxf asterisk-perl-0.08.tar.gz
  • cd asterisk-perl-0.08
  • perl Makefile.PL && make all && make install

***Install Jansson

  • cd /usr/src/
  • wget http://www.digip.org/jansson/releases/jansson-2.9.tar.gz
  • tar -zvxf jansson-2.9.tar.gz
  • cd jansson-2.9
  • ./configure && make clean && make && make install
  • ldconfig
  • rm *.tar.gz

***Install Asterisk – Dadhi and libpri

  • mkdir /usr/src/asterisk
  • cd /usr/src/asterisk
  • wget http://downloads.asterisk.org/pub/telephony/libpri/libpri-current.tar.gz
  • wget http://downloads.asterisk.org/pub/telephony/dahdi-linux-complete/dahdi-linux-complete-current.tar.gz
  • wget http://download.vicidial.com/required-apps/asterisk-13.29.2-vici.tar.gz
  • tar xzf asterisk-*
  • tar xzf dahdi-linux-complete-*
  • tar xzf libpri-*
  • cd /usr/src/asterisk/dahdi-linux-complete-3.1.0+3.1.0/
  • rpm -i https://rpmfind.net/linux/opensuse/update/leap/15.1/oss/noarch/kernel-devel-4.12.14-lp151.28.48.1.noarch.rpm
  • make && make install
  • cd /usr/src/asterisk/libpri-1.6.0
  • make clean
  • make
  • make install
  • cd /usr/src/asterisk/asterisk-13.29.2/
  • ./configure –libdir=/usr/lib64
  • make clean
  • make menuselect*
  • !!!*MAKE SURE TO scroll down to Applications, press enter, scroll down to > App.MeetME press space bar so you see: [*] and press x to save and exit
  • make && make install && make samples
  • chkconfig asterisk on

***DataBase Creation

  • mysql -p
  • press enter for no password
  • CREATE DATABASE `asterisk` DEFAULT CHARACTER SET utf8 COLLATE utf8_unicode_ci;
  • CREATE USER ‘cron’@’localhost’ IDENTIFIED BY ‘1234’;
  • GRANT SELECT,INSERT,UPDATE,DELETE,LOCK TABLES on asterisk.* TO cron@’%’ IDENTIFIED BY ‘1234’;
  • GRANT SELECT,INSERT,UPDATE,DELETE,LOCK TABLES on asterisk.* TO cron@localhost IDENTIFIED BY ‘1234’;
  • GRANT RELOAD ON *.* TO cron@’%’;
  • GRANT RELOAD ON *.* TO cron@localhost;
  • flush privileges;
  • quit

***Install ViciDial

  • mkdir /usr/src/astguiclient
  • cd /usr/src/astguiclient
  • svn checkout svn://svn.eflo.net:3690/agc_2-X/trunk
  • cd trunk
  • perl install.pl

##make sure to change web directory to /srv/www/htdocs and to put your public ip, and to put 13.X for asterisk version

***Import MySQL Settings

  • mysql -u root -p
  • SET GLOBAL connect_timeout=60;
  • use asterisk;
  • \. /usr/src/astguiclient/trunk/extras/MySQL_AST_CREATE_tables.sql
  • \. /usr/src/astguiclient/trunk/extras/first_server_install.sql
  • ALTER TABLE phones
  • ALTER template_id SET DEFAULT ”;
  • \. /usr/src/astguiclient/trunk/extras/sip-iax_phones.sql
  • quit

/usr/share/astguiclient/ADMIN_area_code_populate.pl

***Edit /etc/rc.local to contain the following code (enter vi /etc/rc.local to edit with vi, nano /etc/rc.local to edit with nano, ed /etc/rc.local to edit with sed… choose an editor to your liking):

  • #!/bin/sh
  • #
  • # This script will be executed *after* all the other init scripts.
  • # You can put your own initialization stuff in here if you don’t
  • # want to do the full Sys V style init stuff.
  • touch /var/lock/subsys/local
  • # OPTIONAL enable ip_relay(for same-machine trunking and blind monitoring)
  • /usr/share/astguiclient/ip_relay/relay_control start 2>/dev/null 1>&2
  • # Disable console blanking and powersaving
  • /usr/bin/setterm -blank
  • /usr/bin/setterm -powersave off
  • /usr/bin/setterm -powerdown
  • ### start up the MySQL server
  • systemctl start mariadb.service systemctl enable mariadb.service
  • ### start up the apache web server
  • systemctl start apache2 systemctl enable apache2
  • ### roll the Asterisk logs upon reboot /usr/share/astguiclient/ADMIN_restart_roll_logs.pl
  • ### clear the server-related records from the database /usr/share/astguiclient/AST_reset_mysql_vars.pl
  • ### load dahdi drivers
  • modprobe dahdi
  • /usr/sbin/dahdi_cfg -vvvvvvvvvvvvv
  • ### sleep for 20 seconds before launching Asterisk
  • sleep 20
  • ### start up asterisk
  • /usr/share/astguiclient/start_asterisk_boot.pl
vicibox 9 scratch install

***Adding to Crontab

crontab -e

**Once it opens, Press “i” and then paste the following into crontab:


  • ### recording mixing/compressing/ftping scripts
  • #0,3,6,9,12,15,18,21,24,27,30,33,36,39,42,45,48,51,54,57 * * * * /usr/share/astguiclient/AST_CRON_audio_1_move_mix.pl
  • 0,3,6,9,12,15,18,21,24,27,30,33,36,39,42,45,48,51,54,57 * * * * /usr/share/astguiclient/AST_CRON_audio_1_move_mix.pl –MIX
  • 0,3,6,9,12,15,18,21,24,27,30,33,36,39,42,45,48,51,54,57 * * * * /usr/share/astguiclient/AST_CRON_audio_1_move_VDonly.pl
  • 1,4,7,10,13,16,19,22,25,28,31,34,37,40,43,46,49,52,55,58 * * * * /usr/share/astguiclient/AST_CRON_audio_2_compress.pl –GSM
  • #2,5,8,11,14,17,20,23,26,29,32,35,38,41,44,47,50,53,56,59 * * * * /usr/share/astguiclient/AST_CRON_audio_3_ftp.pl –GSM
  • ### keepalive script for astguiclient processes
  • * * * * * /usr/share/astguiclient/ADMIN_keepalive_ALL.pl –cu3way
  • ### kill Hangup script for Asterisk updaters * * * * * /usr/share/astguiclient/AST_manager_kill_hung_congested.pl
  • ### updater for voicemail
  • * * * * * /usr/share/astguiclient/AST_vm_update.pl
  • ### updater for conference validator
  • * * * * * /usr/share/astguiclient/AST_conf_update.pl
  • ### flush queue DB table every hour for entries older than 1 hour 11
  • * * * * /usr/share/astguiclient/AST_flush_DBqueue.pl -q
  • ### fix the vicidial_agent_log once every hour and the full day run at night 33
  • * * * * /usr/share/astguiclient/AST_cleanup_agent_log.pl 50 0
  • * * * /usr/share/astguiclient/AST_cleanup_agent_log.pl –last-24hours
  • ## uncomment below if using QueueMetrics
  • #*/5 * * * * /usr/share/astguiclient/AST_cleanup_agent_log.pl –only-qm-live-call-check
  • ## uncomment below if using Vtiger #1 1
  • * * * /usr/share/astguiclient/Vtiger_optimize_all_tables.pl –quiet
  • ### updater for VICIDIAL hopper
  • * * * * * /usr/share/astguiclient/AST_VDhopper.pl -q
  • ### adjust the GMT offset for the leads in the vicidial_list table
  • 1 1,7 * * * /usr/share/astguiclient/ADMIN_adjust_GMTnow_on_leads.pl –debug
  • ### reset several temporary-info tables in the database
  • 2 1 * * * /usr/share/astguiclient/AST_reset_mysql_vars.pl
  • ### optimize the database tables within the asterisk database
  • 3 1 * * * /usr/share/astguiclient/AST_DB_optimize.pl
  • ## adjust time on the server with ntp 30
  • * * * * /usr/sbin/ntpdate -u pool.ntp.org 2>/dev/null 1>&2
  • ### VICIDIAL agent time log weekly and daily summary report generation
  • 2 0 * * 0 /usr/share/astguiclient/AST_agent_week.pl 22 0
  • * * * /usr/share/astguiclient/AST_agent_day.pl
  • ### VICIDIAL campaign export scripts (OPTIONAL)
  • #32 0 * * * /usr/share/astguiclient/AST_VDsales_export.pl
  • #42 0 * * * /usr/share/astguiclient/AST_sourceID_summary_export.pl
  • ### remove old recordings more than 7 days old #24 0
  • * * * /usr/bin/find /var/spool/asterisk/monitorDONE -maxdepth 2 -type f -mtime +7 -print | xargs rm -f
  • ### roll logs monthly on high-volume dialing systems
  • #30 1 1 * * /usr/share/astguiclient/ADMIN_archive_log_tables.pl
  • ### remove old vicidial logs and asterisk logs more than 2 days old
  • 28 0 * * * /usr/bin/find /var/log/astguiclient -maxdepth 1 -type f -mtime +2 -print | xargs rm -f 29 0
  • * * * /usr/bin/find /var/log/asterisk -maxdepth 3 -type f -mtime +2 -print | xargs rm -f
  • 30 0 * * * /usr/bin/find / -maxdepth 1 -name “screenlog.0*” -mtime +4 -print | xargs rm -f
  • ### cleanup of the scheduled callback records
  • 25 0 * * * /usr/share/astguiclient/AST_DB_dead_cb_purge.pl –purge-non-cb -q
  • ### GMT adjust script – uncomment to enable
  • #45 0 * * * /usr/share/astguiclient/ADMIN_adjust_GMTnow_on_leads.pl –list-settings
  • ### Dialer Inventory Report
  • 1 7 * * * /usr/share/astguiclient/AST_dialer_inventory_snapshot.pl -q –override-24hours
  • ### inbound email parser
  • * * * * * /usr/share/astguiclient/AST_inbound_email_parser.pl

!!!!END CRONTAB HERE

reboot

###once it restarts, type “yast” go to network services > http, on the first screen tab to next, then second screen enable all 3 modules(php, python and perl) and then keep going next on the last pages until u get to finish.

vim /etc/asterisk/manager.conf

find enabled=no and change to yes

save and restart

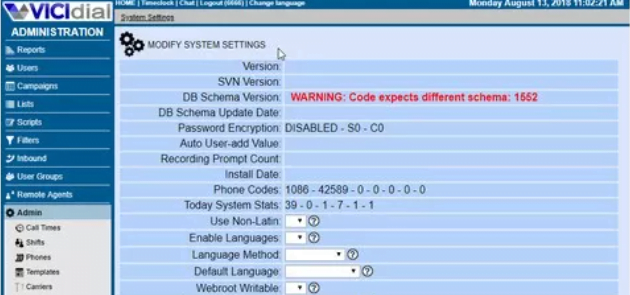
http://127.0.0.1/vicidial/admin.php

Enjoy!!!

Link to easily copy these commands: https://textuploader.com/1qfh9

Or if you prefer the Video version, check our our friend Harolds youtube:

-Nox

How to – Fix the Vicidial error: Code Expects Different Schema

different schema

How to – Fix the Vicidial error: Code Expects Different Schema

This is a pretty easy fix, “Code Expects Different Schema” occurs when you update your svn version but forget to update the db schema through mysql. The instructions are below.

Vicidial-warning-code-expects-different-schema

After database dump restoration taken from older Vicibox to the latest Vicibox 9.0.3 I got the following error in Admin -> System Settings section:

WARNING: Code expects different schema: 1585

It’s not possible to change or save any setting. The reason is obvious: Vicibox 9 has new and altered tables and functions so you will have to add them to the restored database before you can use system.

First, confirm your current database schema version. Log in to MariaDB command prompt and perform the following query:

1MariaDB> SELECT db_schema_version FROM system_settings;

Next, navigate to /usr/src/astguiclient/trunk/extras folder and locate upgrade_X.XX.sql files. Open the newest file and if it contains this schema version – this is the one that needs to be executed. In case you found your DB schema version not in the newest .sql , execute it first and then all newer files.

Please make note that some tables and functions may already exist in your database that’s why add -f key to the mysql command:

1# mysql -u root -f asterisk < /usr/src/astguiclient/trunk/extras/upgrade_2.14.sql

Confirm your current database schema version again and make sure it’s been upgraded.

Now you should be able to use the system and change/set settings.

I hope this helps

-Nox

How to – Fix error in Vicidial: There is a time synchronization problem with your system, please tell your system administrator

How to – Fix error in Vicidial: There is a time synchronization problem with your system, please tell your system administrator

There is a time synchronization problem with your system, please tell your system administrator

There is a time synchronization problem with your system
Time Sync Error

In case you have this error upon installation or upgrade your Vicibox/Vicidial check the following:

  1. Using timedatectl utility make sure server’s timezone is set correctly and server’s date/time is correct. Set proper timezone if needed
  2. Check that timezone is correct in /etc/php7/apache2/php.ini. Set proper timezone if needed and restart Apache
  3. If it did not help check and compare time values in Vicidial database, server time and PHP time. Use the following command:
1# echo “SELECT server_ip, UNIX_TIMESTAMP(last_update),UNIX_TIMESTAMP(db_time) from server_updater” | mysql -uroot asterisk && php -r “date_default_timezone_set(‘America/New_York’); echo ‘php time: ‘.date(‘U’);” && echo “”

Specify your timezone in the command above. This should output three values that must be the same.

If DB time is wrong it means that /usr/share/astguiclient/AST_update.pl script does not update DB value. Try to launch it manually and check for output.

If it throws error:

pattern match timed-out at /usr/share/astguiclient/AST_update.pl line 470

The code at line 470 is a “waitfor()” function that is attempting to match the response from the Asterisk server with a regex pattern but the response from the server doesn’t match the regex pattern.

Patch the file:

in two places near line 470 and near line  534 replace:

$t->waitfor(‘/[0123]\n$/’);

with

$t->waitfor(‘/[0123456789]\n$/’);

then make sure AST_update.pl can run and DB time value is updated.

It expects only 0123 at the end while Asterisk Manager responses with:

123456789# telnet 127.0.0.1 5038 Trying 127.0.0.1… Connected to 127.0.0.1. Escape character is ‘^]’. Asterisk Call Manager/2.10.<strong>5</strong>

Another way to patch:

Original: $t-waitfor(‘/[0123]\n$/]);

Replacement: $t-waitfor(‘/Asterisk Call Manager.+\n$/’);

Check the following files for this issue and patch them as well:

AST_manager_listen.pl   – line 237
AST_manager_listenBUFFER.pl  
– line 236


/usr/share/astguiclient/AST_update.pl runs in a separate detached “ASTupdate” screen and can be accessed as:

1# screen -r ASTupdate

maybe you will need to kill it and start it up again after your database changes was made

To see the list of screens:

12345678910111213141516171819# screen -ls There are screens on:         2715.ASTemail   (Detached)         2712.ASTVDadFILL        (Detached)         2709.ASTfastlog (Detached)         2706.ASTVDadapt (Detached)         2691.ASTupdate  (Detached)         2315.asterisk   (Detached)         2302.astshell20200129173240     (Detached) 7 Sockets in /run/screens/S-root.

Tired of being tethered to an office or a computer? Unleash yourself today!

Tired of being locked to your desk at work? What about concerns about Covid? Do you want to be able to work not only from home, but from anywhere….with any device? Well, we have some great news for you, not only will you no longer be locked in an office building behind a desk or cubicle, but you don’t need to be tethered to a computer any longer either! Watch the following videos to see how our cloud based predictive dialer works on iPads, Tablets, iPhones and other Android devices, not just the regular devices you’re used to such as laptops and desktops.

iPhone
Laptop

Ask us how we can help you get unleashed from the monotonous routine of hitting the dialer from a confined cubicle, to be able to work from ANY DEVICE from ANYWHERE!! Call us now: 954-947-7572

Is there a dialer system that I can use from any device?

The answer is YES! Our cloud based predictive dialers can be used from any device. We integrate WebRTC technology which allows users to make phone calls from within a browser such as Chrome or Firefox. Below is an example of one of our current clients as he logs into the system as an agent, comes out of pause and his very first call he got through his pitch which automatically popped up(no paper pitch needed), transferred the call to a closer who he was able to speak to first without the customer hearing, then introduced his closer who then happened to close that deal, however the point of this article was to show you in action how some features work without needing additional software for your device such as Zoiper or X-Lite.


Request a quote now to start saving money and taking advantage of such features as: IVR(Intelligent Voice Response), Outbound, Inbound, Survey and Press 1 campaigns, Secure Encryption, built in WebRTC Phone, lead filters for precise targeting, and so much more! Take a test drive now.

How to Avoid Being Marked Scam Likely Caller ID

Scam phone calls have existed for years. However, robocalling technology — systems that allow parties to dial numbers automatically or use prerecorded voice messages — have made receiving fraudulent calls much more common. In 2018, the number of robocalls made per month equaled an estimated 3.4 billion. Though there are many types of non-fraudulent robocalls, ranging from emergency alerts to solicited telemarketing messages, the number of illegitimate calls remains significant.

In response to the growing number of scam calls to mobile phones, many carriers and third parties have created tools to identify and block scam calls. Unfortunately, these tools aren’t perfect. Businesses that use legitimate robocalls, and even some that don’t, may have their numbers incorrectly marked by scam ID technology, particularly when calling cell numbers. With smartphones in the hands and pockets of 81 percent of U.S. adults, you need to know that your calls are reaching your customers. Read on to learn how you can avoid being marked with a Scam Likely caller ID.

What Is Scam Likely Caller ID?

In an attempt to improve customer experience, the carrier T-Mobile launched a feature called Scam ID, which is automatically enabled on T-Mobile and MetroPCS devices. When someone calls one of these devices, T-Mobile checks the number against its database of reported scam numbers. If the source matches a reported scam number, the person being called sees a message that says “Scam Likely” alongside standard caller ID. The user can then decide whether or not to answer the call.

In addition to Scam ID, T-Mobile and MetroPCS also allow customers to opt in to a Scam Block feature that prevents all Scam Likely calls from reaching the user’s phone. Though T-Mobile was the first carrier to integrate this feature into their service for free, other carriers have since introduced their own paid and free versions. Third party apps also allow smartphone users to detect, report and block scam calls.

While Scam Likely Caller ID features do help users avoid potential scams, they sometimes mark legitimate calls incorrectly. To understand why, let’s take a look at what Scam ID uses to identify risky calls.

What Scam ID and Other Services Look For

To identify likely scam calls, T-Mobile’s Scam ID looks for two main traits associated with fraud and robocalling: a high volume of calls originating from the number and existing complaints filed about the number. This means numbers marked with “Scam Likely” tend to be either numbers that originate a large number of robocalls or numbers that have a record of being reported by recipients as scams.

Scam ID successfully blocks many illegal calls. However, there are two problems that lead to legitimate calls being blocked:

1. The algorithm fails to distinguish between legal and illegal robocalls: Because the system looks only for high-volume originating numbers, the service may mark legal robocalls as scam. Examples of legal robocalls include calls from non-profits and telemarketing calls made with a person’s express consent.

2. Users may report a number erroneously: Some people avoid calls from all unknown numbers. As a result, some customers may report your number without answering the phone. If this happens enough, your number will be marked Scam Likely.

How Scam Likely Phone Block Can Hurt Your Business

Getting a number marked Scam Likely incorrectly is common for businesses and organizations using legitimate robocalling. This mislabeling can harm your business by:

  • Preventing people from getting your calls: If a customer has Scam Block or an equivalent feature enabled on their phone, they won’t receive your calls, leading to lost leads and a decreased number of call responses.
  • Convincing people to ignore your calls: People tend to ignore or decline calls accompanied by scam warnings, which could lead to miscommunication and lost leads as well. In one study, only one in 10 people reported answering a call from a Scam Likely number.
  • Creating customer dissatisfaction: When customers don’t receive a call they’re expecting, they can become frustrated with your business. Miscommunication created by Scam Likely caller ID can lose you customers, especially if it prevents you from delivering your product or service on time.

Four Ways You Can Avoid Being Marked Scam Likely

Because getting incorrectly listed as a scam number can have an enormous impact on the success of your business, you need to take steps to avoid being marked with this caller ID. Use these strategies to protect your number:

1. Understand robocall laws: The Federal Communications Commission (FCC) has laws about making robocalls. Making sure you understand the FCC’s robocall laws helps you stay off scam number databases and gives you legal ground should your number be marked incorrectly.

2. Originate calls individually: If you can originate calls to customers individually, do so. This prevents Scam ID from identifying your number when searching for high-volumes of calls coming from a single number.

3. Ask customers to save your number: Some third-party scam blocking apps allow users to block calls from unknown numbers. Others even generate databases by excluding numbers stored in users’ contacts. Asking users to save your number can help ensure your call reaches them successfully.

4. Change numbers often: Most large contact centers change phone numbers often to avoid getting marked Scam Likely. You can also use this strategy, though it may not be practical for every business.

What to Do If You’re Already Marked Scam Likely

It’s often easier to avoid getting marked as a scam than to resolve the problem after the fact. The fastest way to get your company’s calls removed from a scam list is to change your phone number. However, you can also use these strategies to resolve the mistake and mitigate losses:

  • Report the mistake to the carrier or blocking service and request a correction
  • Keep customers informed and ask them to turn off their scam call blockers
  • Temporarily switch to another communication channel, such as email

Your ability to reach customers is an essential part of keeping your business running. As a result, you need to ensure your calls reach recipients without the burden of a Scam Likely label.

How can CyburDial help you with this?

CyburDial uses Spam Mitigation which utilizes advanced algorithms to help mitigate calls against the “RoboKillers” and other Crowdsourcing API’s, not to mention our built in Carrier API that helps with calls directly with the major telco’s such at AT&T, T-Mobile, Verizon, Metro PCS and more. We work directly with the pioneers of the STIR/SHAKEN movement and have had the privilege’s to be blessed to beta test most of their apps before they come out to the public as well as being blessed with special pricing for this amazing service they call The DID manager combined with AI Health monitoring to constantly keep your DID’s fresh and not marked as “spam likely”. When you have a dialer system custom built for you by CyburDial you will be ahead of the game ten fold and no longer have to worry about your caller ID numbers showing up as scam likely, but thats not all, the DID manager also provides complete local area calling presence, so if your calling Miami, the caller ID will show up with a 305 or 786 area code, as it would also do with other states. Stop wasting time with all these other dialer hosting companies that not only control your dialer and force you to use their carrier service, their support team which is usually over priced, and Caller ID’s that are marked scam likely within days and let us show you what the future is about. We don’t rent you a server that we control, we custom build you YOUR own server that we can integrate with any CRM system that YOU own, YOU have total control over and YOU choose every aspect of your system including your support team, of course we are available for support if you like to use our services but it isn’t required. So what are you waiting for? Call us now at  1(833)DIALER-1 or visit our 24 hour 7 days a week live support chat on Skype by clicking here.

We look forward to hearing from you and are ready to custom build your dialer with full integrations to CRM or other systems if needed, Turnaround time for strictly a dialer system is 24 hours, if you need integrations, we can discuss this further and give you an estimated time then.

-Chris aka carpenox(from the ViciDial forums)

Check out our live demo free!

CyburDIal Admin

Check out the capabilities of our cloud based predictive dialer with our live demo. We offer Vicidial, ViciDialNOW, GoAutoDial and more.

Want to check out what we can offer? Login to the newest version of ViciDial in the industry, backed by a non public version of Asterisk(18.19.0) and also equipped with CyburPhone 3.5(Unreleased) and take it for a test drive now.

Https://demo.dialer.one
Admin Login: 0000 / Password: demo
Agent Login: 0000 / Password: demo

Our services come backed by our cyber security expertise giving you the most protection for your data and sensitive information.

We offer setups for Outbound, Inbound, Surveys, and press 1 campaigns. Multi cluster setups custom made to meet your needs. Check out the second picture to see one of our cluster setups .

Can you run VICIdial on an iPhone?

That’s an interesting question. Given the current state we’re in with global pandemics threatening shutdowns for some and work-from-home for others, many of us are looking for mobile work-from-anywhere solutions. At Cyburity LLC we are always pushing the envelope to see what we can do next and how much farther we can push contact center technology. Check out this video to see how our cloud based dialers come stock with the technology to work not only from anywhere, but with any device.

Metasploit — A Walkthrough Of The Powerful Exploitation Framework

Ethical Hacker

Metasploit can handle everything from scanning to exploitation. In this article, we will take a look at what makes Metasploit the most versatile penetration testing toolkit.

Image for post

Intro to Penetration Testing

If you are new to penetration testing, let me explain what it is before I introduce you to an exploitation tool.

Penetration testing is hacking with permission. You might have seen cool hackers on TV attacking computer systems without getting caught. But that’s not how it works in the real world.

If you hack someone without permission, there is a high chance that you will end up in jail. So if you are planning to learn hacking with evil intentions, I am not responsible for any damage you cause. All my articles are purely educational.

So, if hacking is bad, why learn it in the first place? Every device on the internet is vulnerable by default unless someone secures it.

Its the job of the penetration tester to think like a hacker and attack his or her organization’s systems. The penetration tester then informs the organization about the vulnerabilities and advises on patching them.

Penetration testing is one of the highest-paid jobs in the industry. There is always a shortage of pen-testers since the number of devices on the internet is growing exponentially.

Right. Enough pep talk. Let’s look at one of the coolest pen-testing tools in the market — Metasploit.

Metasploit — The Complete Framework

Metasploit is a penetration testing framework that helps you to find and exploit vulnerabilities in systems. It gives you everything you need from scanners to third-party integrations that you will need throughout an entire penetration testing lifecycle.

This includes reconnaissance, scanning, exploitation, privilege escalation, and maintaining access.

Image for post
Penetration testing lifecycle

Metasploit is an open-source framework written in Ruby. Metasploit is written to be an extensible framework so that if you want to build custom features using Ruby, you can easily do that via plugins.

Rapid7, the company behind Metasploit offers a premium version of Metasploit with advanced features.

Metasploit is also frequently updated with new exploits published in the Common Vulnerabilities and Exposures (CVE). So if a new vulnerability is found and published, you can start scanning your systems right away.

Metasploit comes with anti-forensic and evasion tools built into it. Metasploit is also pre-installed in the Kali operating system.

Components

Now that you know what Metasploit is, let’s look at the core concepts of Metasploit.

Metasploit offers you a few key components to find and exploit vulnerabilities on a network. This includes exploits, payloads, auxiliaries, and so on. Let’s look at each one of them in detail.

Exploits

An exploit is a piece of code that takes advantage of a vulnerability in a system. These exploits perform specific actions based on how bad the vulnerability is.

Exploits can take advantage of software vulnerabilities, hardware vulnerabilities, zero-day vulnerabilities, and so on. Some of the common exploits include buffer overflows, SQL injections, and so on.

Image for post
Metasploit exploits list

Metasploit offers a number of exploits that you can use based on the existing vulnerabilities in the target system. Metasploit exploits can be classified into two types:

  • Active Exploits — Active exploits will run on a target system, exploit the system, gives you access or performs a specific task, and then exits.
  • Passive Exploits — Passive exploits will wait until the target system connects to the exploit. This approach is often used by hackers on the internet asking you to download files or software. Once you do, you connect yourself to a passive exploit running on the hacker’s computer.

Payloads

A payload is a piece of code that runs through the exploit. You use exploits to get into a system and payloads to perform specific actions.

For example, you can use a keylogger as a payload along with an exploit. Once the exploit is successful, it will install the keylogger in the target’s system.

Metasploit offers a good collection of payloads like reverse shells, bind shells, Meterpreter, and so on.

Image for post
Payloads

There are a few payloads that will work with the majority of exploits, but it takes some research to find the right payload that will work with the exploit. Once you choose an exploit, you can list the payloads that will work with that exploit using the ‘show payloads’ command in Metasploit.

There are a few types of payloads in Metasploit. The ones you will end up using the most are these three types:

  • Singles — Payloads that work on their own. eg. keyloggers.
  • Stagers — Payloads that work with others eg. two payloads: one to establish a connection with the target, the other to execute an instruction.
  • Meterpreter — Advanced payload that lives on the target’s memory, hard to trace, and can load/unload plugins at will. We have a section on Meterpreter where I will explain it in detail.

Auxiliaries

Auxiliaries are modules that help you perform custom functions other than exploiting a system. This includes port scanners, fuzzers, sniffers, etc.

For example, you can use the CERT auxiliary to check for expired SSL certificates on a network. This is useful for system administrations to automate certificate management.

Image for post
Metasploit Auxiliaries

If you are familiar with Ruby, you can write your own auxiliaries. If you want to scan a network for specific vulnerabilities every week, you can write your own custom auxiliary module to do that. You can then use it to scan your network instead of using an existing scanner like Nmap.

Tools

Now that you know how Metasploit functions, let’s look at the tools that Metasploit offers.

msfconsole

MsfConsole is the default interface for Metasploit. It gives you all the commands you need to interact with the Metasploit framework.

It takes a bit of a learning curve to familiarize yourself with the CLI, but once you do, it is easy to work with. Also, MsfConsole is the only way you can access all the features of Metasploit.

Image for post
msfconsole

MsfConsole also offers tab-completion for common commands. Making yourself familiar with the MsfConsole is an important step in your journey to becoming a Metasploit professional.

msfdb

If you are working with large networks on a regular basis, chances are, you will need a place to store your data. This includes scan results, login credentials, and so on.

Metasploit offers a database management tool called msfdb. msfdb works on top of a PostgreSQL database and gives you a list of useful commands to import and export your results.

Image for post
msfdb Commands

With msfdb, you can import scan results from external tools like Nmap or Nessus. Metasploit also offers a native db_nmap command that lets you scan and import results using Nmap within the msfconsole.

MsfVenom

Finally, we have msfvenom (cool name, huh?). msfvenom enables you to generate custom payloads depending on your target.

Using an antivirus or a firewall can make a target system relatively secure. In those cases, existing Metasploit payloads might not work since they are generic for all systems falling under an operating system or a service.

Image for post
msfvenom

msfvenom was built by combining two older tools that Metsploit had: msfpayload and msfencode. msfvenom lets you create and encode custom payloads for your exploits.

Based on the additional information you have on the target, you can craft your own payloads to achieve a higher success rate during your penetration test.

Meterpreter

Metasploit is an advanced payload in Metasploit. Unlike other payloads that perform a specific function, Meterpreter is dynamic and can be scripted on the fly.

Image for post
Meterpreter Functions

If you can exploit a system and inject Meterpreter as the payload, here are some of the things you can do:

  • Establish an encrypted communication between your system and the target.
  • Dump password hashes from the target system.
  • Search for files on the target’s filesystem
  • Upload / Download files
  • Take webcam snapshots

Meterpreter is also incredibly stealthy. Since Meterpreter lives in the memory of the target, it is extremely hard to detect. It is also hard to trace Meterpreter using forensic tools.

Image for post
Meterpreter Python Module

You can write Meterpreter scripts on the fly using Ruby to carry out custom functions. Meterpreter also has a Python module that gives you additional commands to execute python scripts on the target machine.

Armitage

Armitage is a graphical user interface for Metasploit, written in Java. Armitage is considered to be a great addon for pen-testers familiar with the command-line interface.

Image for post
Armitage GUI

The core feature of Armitage is to visualize targets and recommend exploits. Armitage is also scriptable, which means you can automate redundant tasks like host discovery.

Armitage is extremely useful when you are working with a large number of systems in a network. You can use Armitage’s GUI to escalate privileges, browse files, dump password hashes, and so on.

Summary

Metasploit provides a suite of tools for you to perform a complete security audit of a network. Metasploit is frequently updated with the vulnerabilities published in the Common Vulnerabilities and Exploits database.

You can also use other tools like Nmap and Nessus with Metasploit through integrations or by importing their scan reports into Metasploit. Metasploit also has a GUI tool called Armitage that lets you visualize targets and recommend exploits.

If you are interested in learning more about Metasploit, check out the detailed reference guide published by Offensive Security.