How to – Upgrade Asterisk 13/16 to Asterisk 18
This post will go over the steps to upgrade your asterisk from 13 or 16 to Asterisk 18. It was pretty easy except for one little bug I ran into but there’s any easy fix for it. Ok so let’s get started.
Step 1 – Download Asterisk 18 to your server.

We need to get the file from the Asterisk website for version 18 which can be found at https://downloads.asterisk.org/pub/telephony/asterisk
Go to your source directory by typing “cd /usr/src/asterisk/” – If the directory doesn’t exist, create it by using mkdir.
Now locate the file you need on the asterisk website (shown below).
Time to download the file by typing “wget https://downloads.asterisk.org/pub/telephony/asterisk/asterisk-18.19.0.tar.gz”
Unzip the file and then we will begin compiling.

Step 2 – Compile Asterisk
We will need Asterisk to be patched with ViciDial changes for it to work correctly. Follow this article. To compile Asterisk, first we need to go to it’s folder by typing “cd /etc/asterisk”. Once here type the following 4 commands:
./configuremake menuselect
make && make install
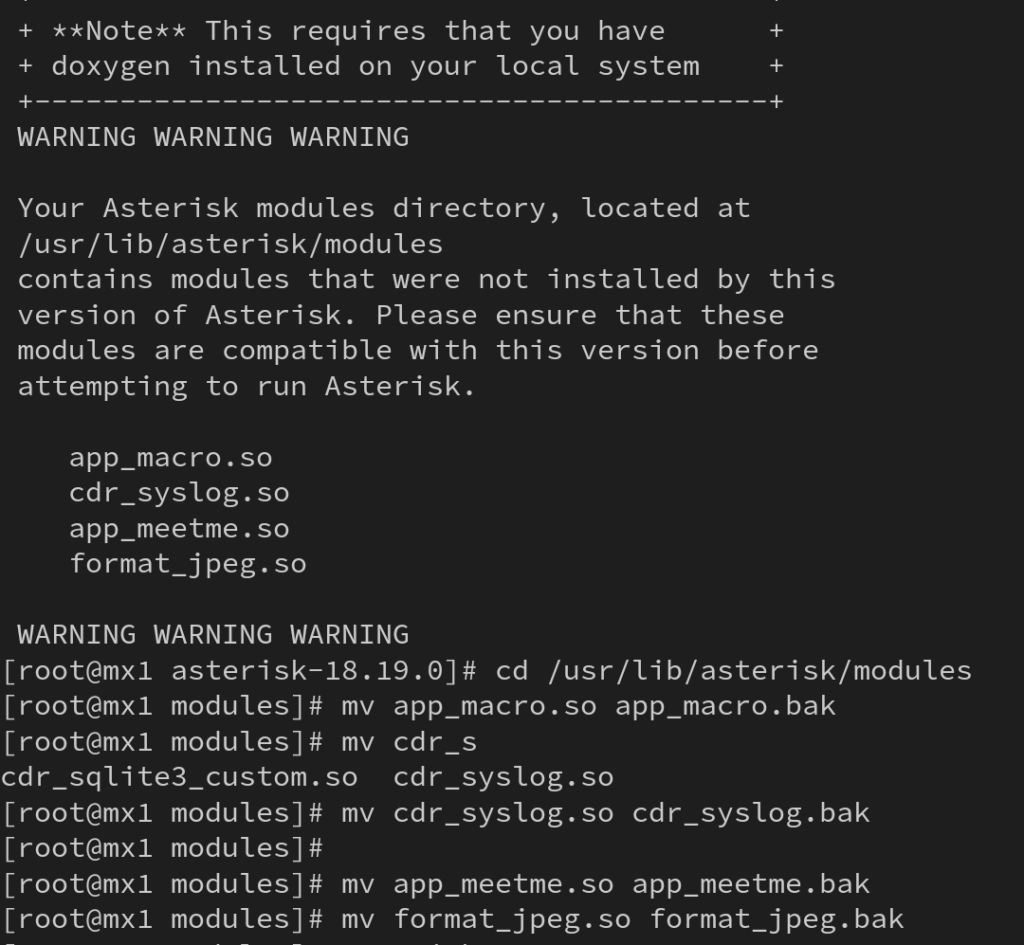
Step 3 – Remove old modules

Remove the 4 files listed above from the directory it tells you. For me it was:
/usr/lib/asterisk/modules
Step 4 – Restart Asterisk
Login to asterisk and restart it by doing “core restart now”. That’s it, you’re now using Asterisk 18.

If for some reason Asterisk doesn’t start up after you restart it, type “screen asterisk vvc” and of it keeps you in the screen press control+A then control+D

Leave a Reply