How to – Upgrade any Leap ViciBox install to Leap 15.6
A lot of people seem to be keeping their systems on older Vicibox installs such as v9 which is on Leap 15.1, v10 which is on Leap 15.3 or v11 which is on Leap 15.5 which are all end of life. The reasoning behind this, is you are thinking that you are safe with whitelist only IP access to the server, however, you are mistaken. As software reaches its end of life, it no longer receives updates. This means it also stops receiving security patches. Even with IP access only, your firewall can be hit with a denial of service attack, taking it offline. All your software, including MySQL, Apache, OpenSSH, and the Linux kernels themselves, can then be hacked using exploits to gain full root to your servers. This article will teach you how to upgrade any of these to the latest and only supported version of Leap, 15.6, so let’s get started.
Step 1 – Upgrade Repo URL’s
In this example, I am upgrading from ViciBox 10 from Leap 15.3 up to 15.6. You will notice the first line of code has s/15.3/15.6/g which you would need to replace the first part with whatever you are upgrading from, such as ViciBox 9 would be 15.1.
sed -i 's/15.3/15.6/g' /etc/zypp/repos.d/*.repo
zypper --releasever=15.6 lr -u
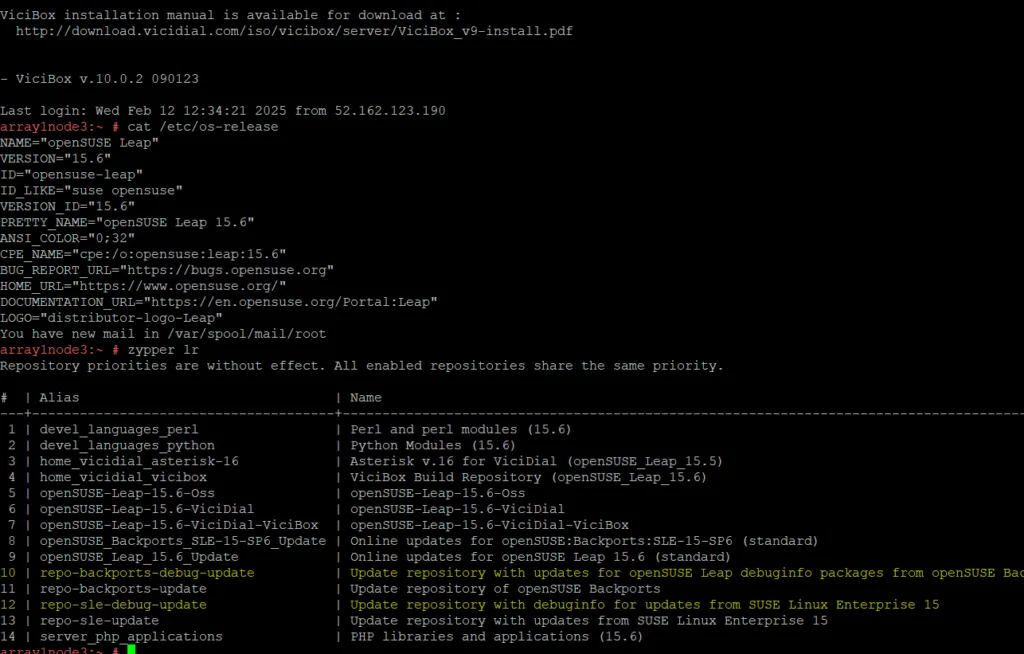
zypper lr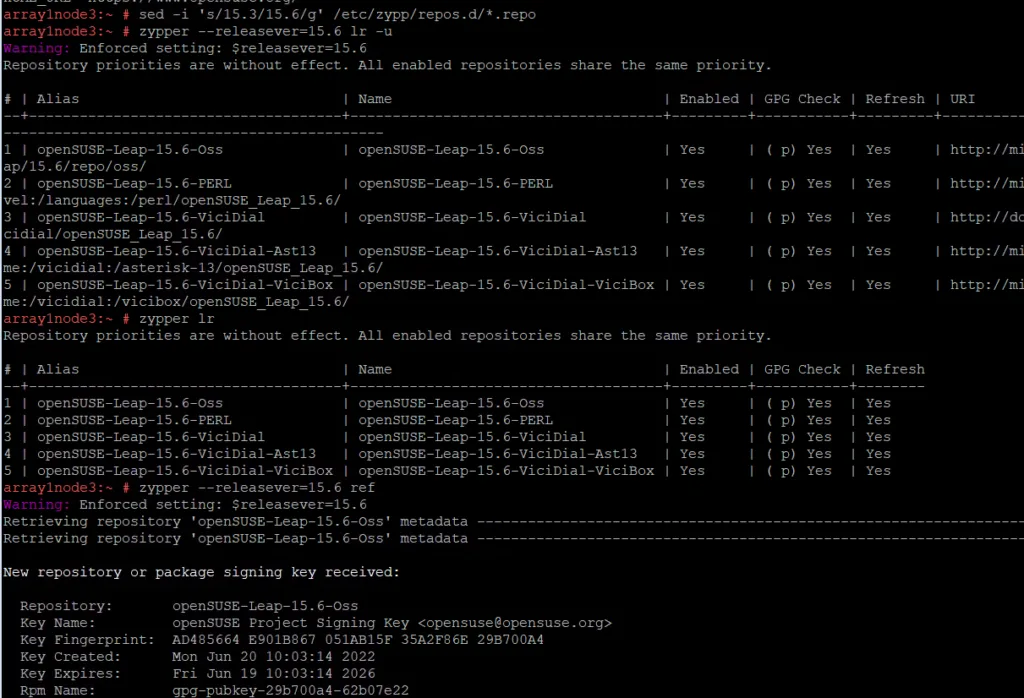
You can see in the picture above, these first steps will replace the repo URL’s, however, some have been changed even more than just the 15.6 portion and we will need to replace those. Below, I will show you how to find which ones to remove by the errors you receive that will be in red.
zypper --releasever=15.6 ref
zypper lr
zypper rr 2
zypper rr 3 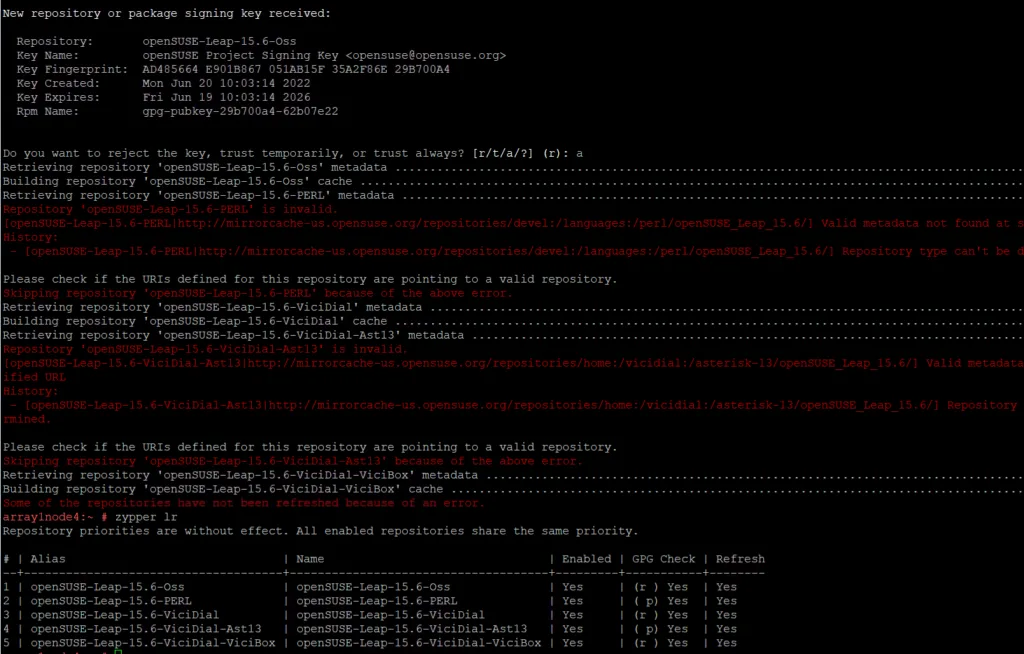
In this picture above, you can see repo #’s 2 and 4 are broken which is Perl and Ast-13 so I removed it with the code above by typing “zypper rr 2” and then “zypper rr 3” (its 3 here and not 4 because when we deleted #2, it moved up one). Now on the next step, we will add all the repo’s we need and replace the ones we deleted.
https://download.opensuse.org/repositories/devel:/languages:/python/15.6/devel:languages:python.repo
zypper ar http://download.opensuse.org/repositories/server:/php:/applications/15.6/server:php:applications.repo
zypper ar https://mirrorcache-us.opensuse.org/repositories/devel:/languages:/perl/15.6/devel:languages:perl.repo
zypper ar https://download.opensuse.org/repositories/home:/vicidial:/vicibox/openSUSE_Leap_15.6/home:vicidial:vicibox.repo
zypper ar https://download.opensuse.org/repositories/home:/vicidial:/asterisk-16/openSUSE_Leap_15.5/home:vicidial:asterisk-16.repo
zypper ar https://download.opensuse.org/update/leap/15.6/oss/openSUSE:Leap:15.6:Update.repo
zypper ar https://download.opensuse.org/update/leap/15.6/backports/openSUSE:Backports:SLE-15-SP6:Update.repo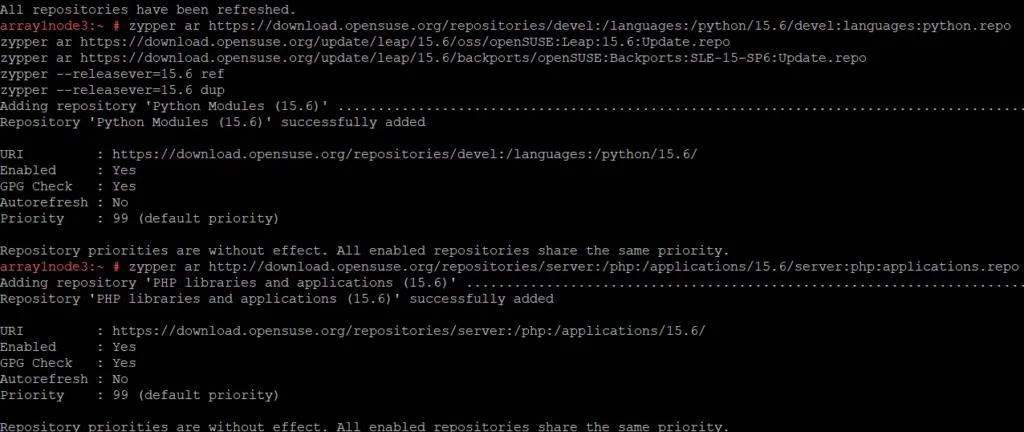
Now the hard part is done, lets run the updates.
Step 2 – Upgrade the OS
zypper --releasever=15.6 ref
zypper --releasever=15.6 dup
When you run these two commands, you will get errors, you want to make sure you are installing asterisk 16 so pressing 1 most of the way down, and then “breaking vicibox-install” towards the end which I believe was 4.
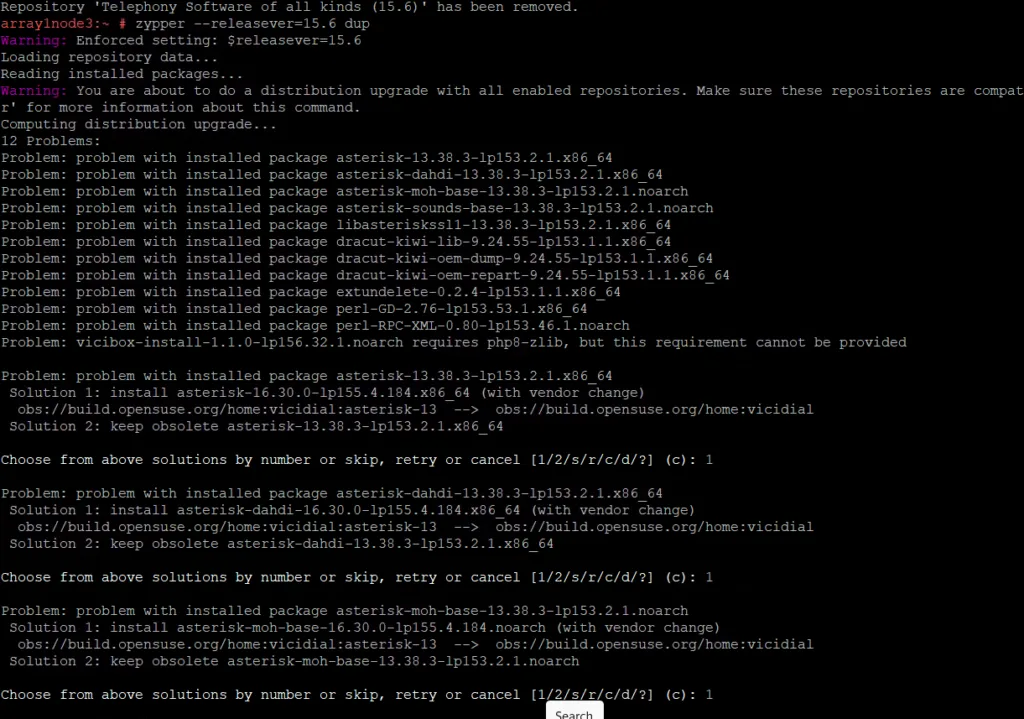
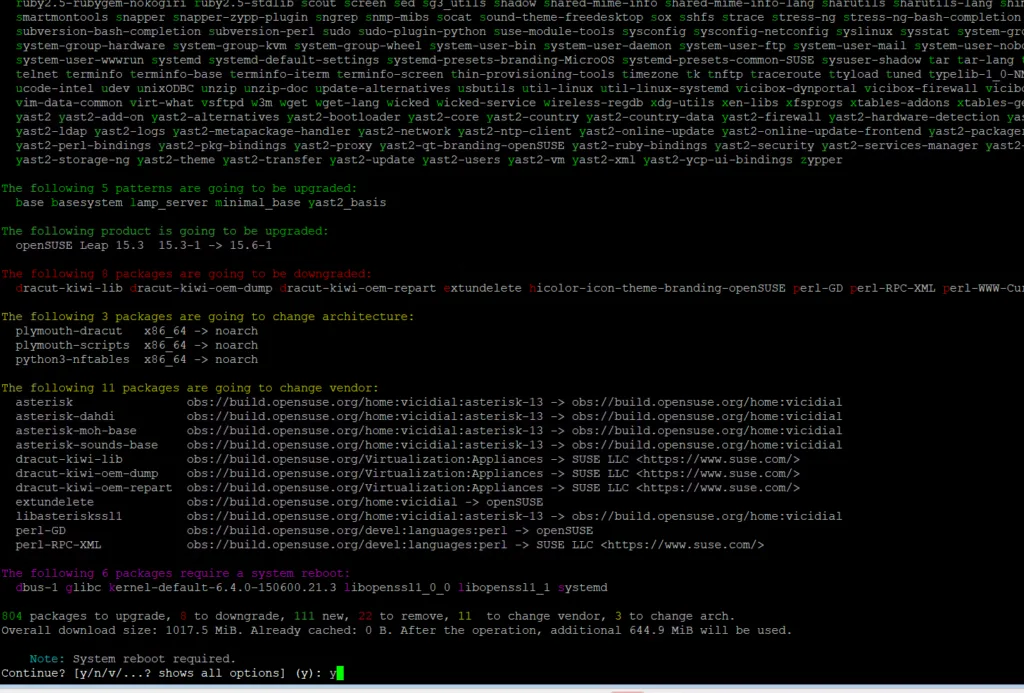
You will then reach the portion to say “y” like in the picture below:
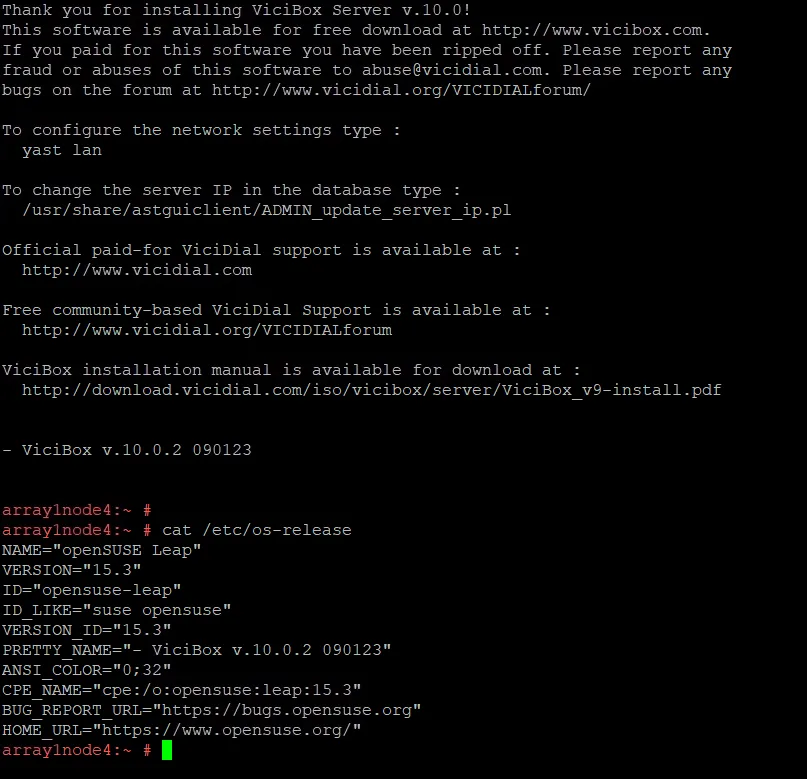
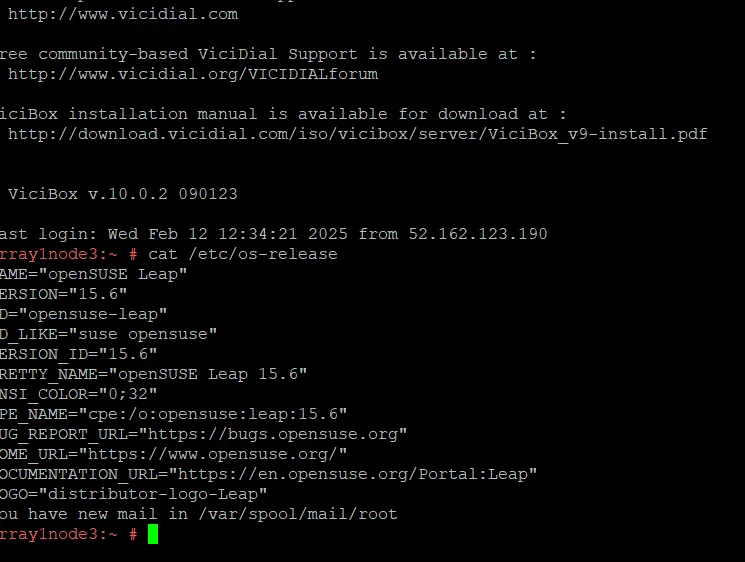
Once everything downloads and installs, you can reboot and you will see the new OS will be labeled as Leap 15.6 when you type “cat /etc/os-release” as you see below even though it is still labeled as ViciBox 10:
Step 3 – Confirm everything that ViciDial needs is installed
zypper install ppp ppp-devel autoconf automake kernel-default-devel kernel-devel gcc make libtool libedit-devel libedit kernel-default dahdi* libopenssl-devel

zypper install php screen php-mcrypt subversion php-cli php-gd php-curl php-mysql php-ldap php-zip php-fileinfo php-opcache

zypper in wget unzip make patch gcc gcc-c++ subversion php php-devel php-gd gd-devel readline-devel php-mbstring php-mcrypt

zypper in php-imap php-ldap php-mysqli php-odbc php-pear php-xml php-xmlrpc curl curl-devel perl-libwww-perl ImageMagick

zypper in newt-devel libxml2-devel kernel-devel sqlite-devel libuuid-devel sox sendmail lame-devel htop iftop perl-File-Which

zypper in php-opcache libss7 mariadb-devel libss7* libopen*

zypper install sqlite-devel httpd mod_ssl nano chkconfig libedit-devel uuid* libxml2*
Step 4 – Enable services
We need to reactive the asterisk and dahdi services by typing the following commands:
systemctl enable asterisk
systelctm enable dahdi
Reboot and verify everything is running correctly, check your sockets with “screen -ls” (make sure “send” and “listen” are there. Check dahdi with “dahdi_cfg -v” and if it errors, run “modprobe dahdi” and you should be good to go, but if you have any issues, join our discord at the bottom of any page for more help.
Chris aka carpenox
Leave a Reply