How to – scratch install Vicidial on Ubuntu

Realtime Report

How to – scratch install Vicidial on Ubuntu

This article will go over how to scratch install Vicidial on Ubuntu 14 – 22

Step 1 – The Basics

apt-get update
apt-get upgrade
apt-get install apache2 -y
apt-get install build-essential -y
apt-get install mariadb-client-10.3 -y
apt-get install mariadb-server -y

apt-get install subversion libjansson-dev sqlite autoconf automake libxml2-dev libncurses5-dev -y

add-apt-repository ppa:ondrej/php

apt-get install iftop lame libmysqlclient* -y

apt update
apt upgrade

sudo apt-get install apache2 apache2-bin apache2-data libapache2-mod-php7.4 php7.4 php7.4-cli php7.4-common php7.4-json php7.4-mysql php7.4-readline sox lame screen libnet-telnet-perl php7.4-mysqli -y

apt-get install libasterisk-agi-perl -y

apt-get install libelf-dev -y

apt-get install autogen libtool shtool -y

apt-get install libc6-i386 -y

Step 2 – The CPAN’s

root@vici01:~# cpan

install below modules

install CPAN::Meta::Requirements
install CPAN
reload cpan
install YAML
install MD5
install Digest::MD5
install Digest::SHA1
install Bundle::CPAN
reload cpan
install DBI
force install DBD::mysql
install Net::Telnet
install Time::HiRes
install Net::Server
install Switch
install Mail::Sendmail
install Unicode::Map
install Jcode
install Spreadsheet::WriteExcel
install OLE::Storage_Lite
install Proc::ProcessTable
install IO::Scalar
install Spreadsheet::ParseExcel
install Curses
install Getopt::Long
install Net::Domain
install Term::ReadKey
install Term::ANSIColor
install Spreadsheet::XLSX
install Spreadsheet::Read
install LWP::UserAgent
install HTML::Entities
install HTML::Strip
install HTML::FormatText
install HTML::TreeBuilder
install Time::Local
install MIME::Decoder
install Mail::POP3Client
install Mail::IMAPClient
install Mail::Message
install IO::Socket::SSL
install MIME::Base64
install MIME::QuotedPrint
install Crypt::Eksblowfish::Bcrypt
install readline

Step 3 – Install Asterisk and Dahdi:

Install dahdi

apt install dahdi*

Test dahdi

modprobe dahdi

root@vici02:~# /usr/sbin/dahdi_cfg -v

DAHDI Tools Version – 2.11.1-rc1

DAHDI Version: 2.11.1-rc1

Echo Canceller(s):

Configuration

======================

Channel map:

0 channels to configure.

Install Asterisk

cd /usr/src
wget http://download.vicidial.com/beta-apps/asterisk-16.17.0-vici.tar.gz
tar -xvf asterisk-16.17.0-vici.tar.gz
cd asterisk-16.17.0-vici/
./contrib/scripts/install_prereq install 
./bootstrap.sh

This could take time..

./configure –libdir=/usr/lib –with-gsm=internal –enable-opus –enable-srtp –with-ogg=/usr/lib64/ –with-ssl –enable-asteriskssl –with-pjproject-bundled

make && make menuconfig

select app_meetme in Applications(Vicidial Need this for conference)

make install && make samples && make basic-pbx

Step 4 – WebRTC Extra steps(IF YOU DONT NEED WEBRTC SKIP BELOW STEPS)

Note: Since WebRTC need SSL i am using my Public Domain to Generate SSL from Let’s Encrypt.
How to Generate SSL: Link here

sample http.conf

cat /etc/asterisk/http.conf
[general]
enabled=yes
bindaddr=0.0.0.0
bindport=8088
enablestatic=yes
tlsenable=yes
tlsbindaddr=YOURPUBLICIP:8089

(replace cyburdial.com with your domain)

tlscertfile=/etc/letsencrypt/live/cyburdial/fullchain.pem
tlsprivatekey=/etc/letsencrypt/live/cyburdial/privkey.pem

Install VICIDIAL from Source:
cd /usr/src
mkdir astguiclient/
cd astguiclient/
svn checkout svn://svn.eflo.net/agc_2-X/trunk
cd trunk/
MySQL setup for VICIDIAL:

Step 5 – Create Database

mysql
SET GLOBAL connect_timeout=60;
CREATE DATABASE `asterisk` DEFAULT CHARACTER SET utf8 COLLATE utf8_unicode_ci;
CREATE USER 'cron'@'localhost' IDENTIFIED BY '1234';
GRANT SELECT,INSERT,UPDATE,DELETE,LOCK TABLES on asterisk.* TO cron@'%' IDENTIFIED BY '1234';
CREATE USER 'custom'@'localhost' IDENTIFIED BY 'custom1234';
GRANT SELECT,INSERT,UPDATE,DELETE,LOCK TABLES on asterisk.* TO custom@'%' IDENTIFIED BY 'custom1234';
GRANT SELECT,INSERT,UPDATE,DELETE,LOCK TABLES on asterisk.* TO cron@localhost IDENTIFIED BY '1234';
GRANT SELECT,INSERT,UPDATE,DELETE,LOCK TABLES on asterisk.* TO custom@localhost IDENTIFIED BY 'custom1234';
GRANT RELOAD ON *.* TO cron@'%';
GRANT RELOAD ON *.* TO cron@localhost;
GRANT RELOAD ON *.* TO custom@'%';
GRANT RELOAD ON *.* TO custom@localhost;
flush privileges;
use asterisk;
\. /usr/src/astguiclient/trunk/extras/MySQL_AST_CREATE_tables.sql
\. /usr/src/astguiclient/trunk/extras/first_server_install.sql
ALTER TABLE phones ALTER template_id SET DEFAULT '';
quit

Load the initial database

cd /usr/src/astguiclient/trunk/extras
mysql -uroot -p asterisk < MySQL_AST_CREATE_tables.sql

Load First instalation setup database

mysql -uroot -p asterisk < first_server_install.sql

Load sample sip and iax phones(this contain default user pass, carefull when you installing in vpc)

mysql -uroot -p asterisk < sip-iax_phones.sql

Do back to root Directory of vicidial

cd ..
perl install.pl

Follow the setup with appropriate value.

Configiguration example

Populate ISO country codes

cd /usr/src/astguiclient/trunk/bin
perl ADMIN_area_code_populate.pl

update the Server IP with latest IP address.(VICIDIAL DEFAULT IP IS 10.10.10.15)

perl /usr/src/astguiclient/trunk/bin/ADMIN_update_server_ip.pl –old-server_ip=10.10.10.15

Say ‘Yes’ to all

Add crontab entries(Conf generation, Autodialing, Audio mix and other keepalive processes run from here.

###recording mixing/compressing/ftping scripts

0,3,6,9,12,15,18,21,24,27,30,33,36,39,42,45,48,51,54,57 * * * * /usr/share/astguiclient/AST_CRON_audio_1_move_mix.pl

0,3,6,9,12,15,18,21,24,27,30,33,36,39,42,45,48,51,54,57 * * * * /usr/share/astguiclient/AST_CRON_audio_1_move_mix.pl –MIX
0,3,6,9,12,15,18,21,24,27,30,33,36,39,42,45,48,51,54,57 * * * * /usr/share/astguiclient/AST_CRON_audio_1_move_VDonly.pl
1,4,7,10,13,16,19,22,25,28,31,34,37,40,43,46,49,52,55,58 * * * * /usr/share/astguiclient/AST_CRON_audio_2_compress.pl –GSM

2,5,8,11,14,17,20,23,26,29,32,35,38,41,44,47,50,53,56,59 * * * * /usr/share/astguiclient/AST_CRON_audio_3_ftp.pl –GSM

###keepalive script for astguiclient processes

* * * * /usr/share/astguiclient/ADMIN_keepalive_ALL.pl –cu3way

###kill Hangup script for Asterisk updaters

* * * * /usr/share/astguiclient/AST_manager_kill_hung_congested.pl

###updater for voicemail

* * * * /usr/share/astguiclient/AST_vm_update.pl

###updater for conference validator

* * * * /usr/share/astguiclient/AST_conf_update.pl

###flush queue DB table every hour for entries older than 1 hour

11 * * * * /usr/share/astguiclient/AST_flush_DBqueue.pl -q

###fix the vicidial_agent_log once every hour and the full day run at night

33 * * * * /usr/share/astguiclient/AST_cleanup_agent_log.pl
50 0 * * * /usr/share/astguiclient/AST_cleanup_agent_log.pl –last-24hours

###uncomment below if using QueueMetrics

#*/5 * * * * /usr/share/astguiclient/AST_cleanup_agent_log.pl –only-qm-live-call-check

###uncomment below if using Vtiger

#1 1 * * * /usr/share/astguiclient/Vtiger_optimize_all_tables.pl –quiet

###updater for VICIDIAL hopper

* * * * /usr/share/astguiclient/AST_VDhopper.pl -q

###adjust the GMT offset for the leads in the vicidial_list table

1 1,7 * * * /usr/share/astguiclient/ADMIN_adjust_GMTnow_on_leads.pl –debug

###reset several temporary-info tables in the database

2 1 * * * /usr/share/astguiclient/AST_reset_mysql_vars.pl

###optimize the database tables within the asterisk database

3 1 * * * /usr/share/astguiclient/AST_DB_optimize.pl

###adjust time on the server with ntp

30 * * * * /usr/sbin/ntpdate -u pool.ntp.org 2>/dev/null 1>&2

###VICIDIAL agent time log weekly and daily summary report generation

2 0 * * 0 /usr/share/astguiclient/AST_agent_week.pl
22 0 * * * /usr/share/astguiclient/AST_agent_day.pl

###VICIDIAL campaign export scripts (OPTIONAL)

32 0 * * * /usr/share/astguiclient/AST_VDsales_export.pl

42 0 * * * /usr/share/astguiclient/AST_sourceID_summary_export.pl

###remove old recordings more than 7 days old

24 0 * * * /usr/bin/find /var/spool/asterisk/monitorDONE -maxdepth 2 -type f -mtime +7 -print | xargs rm -f

###roll logs monthly on high-volume dialing systems

30 1 1 * * /usr/share/astguiclient/ADMIN_archive_log_tables.pl

###remove old vicidial logs and asterisk logs more than 2 days old

28 0 * * * /usr/bin/find /var/log/astguiclient -maxdepth 1 -type f -mtime +2 -print | xargs rm -f
29 0 * * * /usr/bin/find /var/log/asterisk -maxdepth 3 -type f -mtime +2 -print | xargs rm -f
30 0 * * * /usr/bin/find / -maxdepth 1 -name “screenlog.0*” -mtime +4 -print | xargs rm -f

###cleanup of the scheduled callback records

25 0 * * * /usr/share/astguiclient/AST_DB_dead_cb_purge.pl –purge-non-cb -q

###GMT adjust script – uncomment to enable

45 0 * * * /usr/share/astguiclient/ADMIN_adjust_GMTnow_on_leads.pl –list-settings

###Dialer Inventory Report

1 7 * * * /usr/share/astguiclient/AST_dialer_inventory_snapshot.pl -q –override-24hours

###inbound email parser

  • * * * * /usr/share/astguiclient/AST_inbound_email_parser.pl
    Note: Lookout for the recording removal cron. It might fill your server.

Add entries to rc.local file to start vicidial and related services

###OPTIONAL enable ip_relay(for same-machine trunking and blind monitoring)

/usr/share/astguiclient/ip_relay/relay_control start 2>/dev/null 1>&2

###roll the Asterisk logs upon reboot

/usr/share/astguiclient/ADMIN_restart_roll_logs.pl

###clear the server-related records from the database

/usr/share/astguiclient/AST_reset_mysql_vars.pl

###load dahdi drivers

modprobe dahdi

/usr/sbin/dahdi_cfg -vvvvvvvvvvvvv

###sleep for 20 seconds before launching Asterisk

sleep 20

###start up asterisk

/usr/share/astguiclient/start_asterisk_boot.pl

Then Reboot the server.

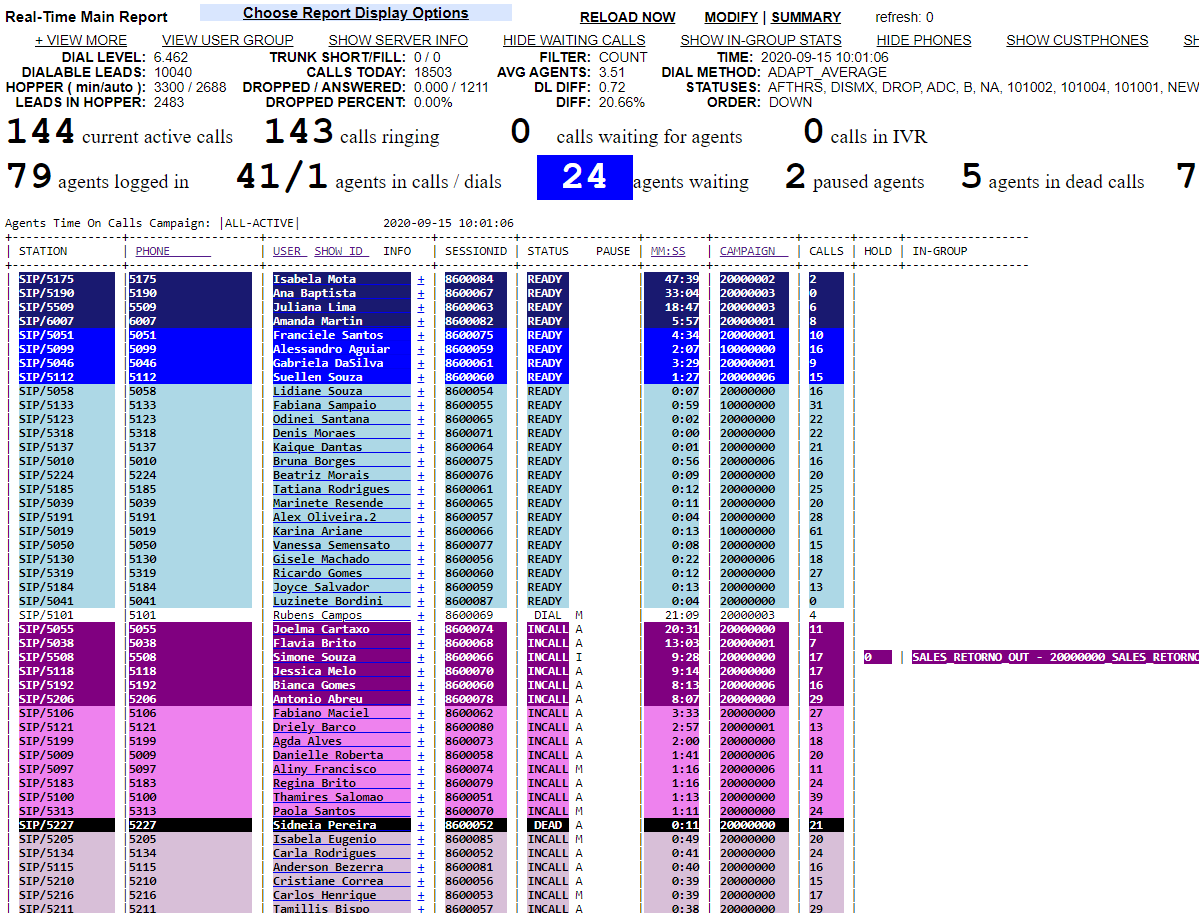
VICIDIAL processes run on screen. There should be 9 Processes running on the screen.
root@vici01:~# screen -ls

There are screens on:

2240.ASTVDremote (03/21/2019 02:16:03 AM) (Detached)

2237.ASTVDauto (03/21/2019 02:16:03 AM) (Detached)

2234.ASTlisten (03/21/2019 02:16:02 AM) (Detached)

2231.ASTsend (03/21/2019 02:16:02 AM) (Detached)

2228.ASTupdate (03/21/2019 02:16:02 AM) (Detached)

2025.ASTconf3way (03/21/2019 02:15:02 AM) (Detached)

2019.ASTVDadapt (03/21/2019 02:15:02 AM) (Detached)

1826.asterisk (03/21/2019 02:14:51 AM) (Detached)

1819.astshell20190321021448 (03/21/2019 02:14:49 AM) (Detached)

9 Sockets in /var/run/screen/S-root.
All Set now. Now, You can configure web interface and logins.
Vicidial Admin login :
http://VICIDIAL_SERVER_IP/vicidial/admin.php
user: 6666
Pass: 1234

How to – install a webphone/viciphone on your Vicidial server

webrtc installation

How to – install a webphone/viciphone on your Vicidial server

UPDATED: Oct. 10th 2023

I’ve been having a bunch of people ask me to write up an article for installing the Viciphone which I never did before because Viciphone.com has some really great instructions already. But I will create this post with picture and alternative Viciphones for you guys to use. There is also an easier method by using my auto installer on my GitHub at this link: https://github.com/carpenox/vicidial-install-scripts. This will complete all the steps below for CentOS, Alma, Rocky or Ubuntu based systems. Leap or ViciBox users will still have to follow the commands below:

CyburPhone
CyburPhone

Step 1 – Create the SSL certificate to use for your server and viciphone

This is a pretty easy process using certbot which uses letsencrypt. the first thing you have to do is setup your FQDN(Fully qualified domain name) to point to your server. For this demonstration I will show you with namecheap.com registrar services. You want to add an A record as shown below:

This you need to run the following command for certbot:

  • certbot certonly –webroot

You’re output should look as it does below:

Step 2 – Install the SSL certificate in Apache

  • cd /etc/apache
  • nano ssl-global.conf
  • scroll down until you see these two lines and change them to point to your certificate and uncomment the SSLCertificateFIle and SSLCertificateKeyFile as show below:
  • cd vhosts.d/
  • nano 1111-default-ssl.conf
  • Edit this file if you have installed using the Vicibox iso, if this is a scratch install you can skip this step.

Step 3 – Install the SSL certificate in Asterisk

  • cd /etc/asterisk/
  • nano http.conf
  • enter the following information as shown below:

[general]
enabled=yes
bindaddr=0.0.0.0
bindport=8088
enablestatic=yes
tlsenable=yes
tlsbindaddr=0.0.0.0:8089
tlscertfile=/etc/letsencrypt/live/cyburdial.com/cert.pem
tlsprivatekey=/etc/letsencrypt/live/cyburdial.com/privkey.pem

  • service apache restart
  • service asterisk restart
  • run this command to make sure the ports are now open and running: ss -ltnu

Go into Aterisk with “asterisk -r” to verify it and type the command: http show status

Step 4 – Install Viciphone 3 or you can try my version of the Viciphone which I call CyburPhone

I will provide two githubs of which you can choose which version you want to use. The first one is by Mike from Viciphone.com of whom I have the utmost respect for his work on the Viciphone to improve it and update to sip.js-0.20. His link is:

https://github.com/vicimikec/ViciPhone

ViciPhone
ViciPhone

To use this you need to go into your root web directory and then git cloning by running the following commands:

  • cd /srv/www/htdocs for Leap or cd /var/www/html for CentOS, Alma or Rocky
  • git clone https://github.com/ccabrerar/ViciPhone.git

Or if you prefer to use my version which looks like this:

CyburPhone

You can go to my github at:

https://github.com/carpenox/CyburPhone

You should already be in the web directory at this point but to use my webrtc phone clone it with this command:

  • git clone https://github.com/carpenox/CyburPhone.git

Now that you’ve downloaded the webrtc phone you’ve decided to use, you need to set the proper permissions for it, for this article I will demonstrate on my version

  • chmod -R 777 CyburPhone/
  • chown -R wwwrun:www CyburPhone/ – Leap
  • chown -R apache:apache CyburPhone – CentOS, Alma and Rocky

You would do the same thing for the Viciphone by just replacing CyburPhone with ViciPhone

Thats it for the phone installation, now to set what you need in the Vicidial GUI

Step 4 – Setting the webphone in Vicidial

Go into Admin > system settings and scroll down near the bottom:

Set the webphone url to the above or if you’re using the Viciphone use https://yourdomain.com/ViciPhone/viciphone.php

Step 5 – Setting the Web Socket URL on the server

Go to admin > servers > your server

Step 6 – Creating the webrtc template

Go to admin > templates and create a new template

Enter the folllwing into the template and change the domain to yours:

type=friend
host=dynamic
encryption=yes
avpf=yes
icesupport=yes
directmedia=no
transport=wss
force_avp=yes
dtlsenable=yes
dtlsverify=no
dtlscertfile=/etc/letsencrypt/live/cyburdial.com/cert.pem
dtlsprivatekey=/etc/letsencrypt/live/cyburdial.com/privkey.pem
dtlssetup=actpass
rtcp_mux=yes

WebRTC Template

Thats all there is to it, now you are all set to use webrtc technology and do away with annoying softphone configurations and reps always complaining about their phone not registering, lol. I hope this article has helped and if you have any problems, feel free to stop by our live support channel on skype or post a comment here: https://join.skype.com/ujkQ7i5lV78O

I hope this helps

-Chris aka carpenox

How to – Scratch install the dynportal on CentOs, Rocky or Alma Linux

how-to-scratch-install-the-dynportal-on-centos/

How to – Scratch install the dynportal on CentOs, Rocky, or Alma Linux

This article will go over the steps to Scratch install the dynportal on a scratch CentOs, Rocky or Alma Linux Vicidial box that normally comes with the ISO. I have created the files you need and host them on one of my sites for download.

Step 1 – Download the necessary files

You will need 4 files to get this working on your server that you can download below

yum install -y firewalld
cd /home
wget https://dialer.one/dynportal.zip
wget https://dialer.one/firewall.zip
wget https://dialer.one/aggregate
wget https://dialer.one/VB-firewall

Step 2 – Move and unzip the files

You can copy and paste the following

  • mkdir -p /var/www/vhosts/dynportal
  • mv /home/dynportal.zip /var/www/vhosts/dynportal/
  • mv /home/firewall.zip /etc/firewalld/
  • cd /var/www/vhosts/dynportal/
  • unzip dynportal.zip
  • cd etc/httpd/conf.d/
  • mv viciportal-ssl.conf viciportal.conf /etc/httpd/conf.d/
  • cd /etc/firewalld/
  • unzip -o firewall.zip
  • mv /home/aggregate /usr/bin/
  • chmod +x /usr/bin/aggregate
  • mv /home/VB-firewall /usr/bin/
  • chmod +x /usr/bin/VB-firewall
Unzip your files

Step 3 – Add your SSL cert to dynportal-ssl.conf and location for redirect is defaults.inc.php

You need to edit your dynportal-ssl.conf file in /etc/httpd/conf.d/

nano /etc/httpd/conf.d/viciportal-ssl.conf

change the location to your SSL cert files

Scratch install the dynportal on CentOs
Dynportal SSL config

nano /var/www/vhosts/dynportal/inc/defaults.inc.php

Step 4 – add entry to crontab

Add the following lines to the bottom of your crontab by typing: crontab -e

### ViciBox integrated firewall, by default just load the VoIP Black list and reload it every 4 hours
### You can lock everyone out of your server if you set this wrong, so understand what you are doing!!!
@reboot /usr/bin/VB-firewall --whitelist=ViciWhite --dynamic --quiet
* * * * * /usr/bin/VB-firewall --whitelist=ViciWhite --dynamic --quiet --flush

Step 5 – Add ports to firewall and apache

Now use firewall-cmd and open port 446 on the firewall for public zone like such:

firewall-offline-cmd --add-port=446/tcp --zone=public --permanent

And edit the apache conf file to add the port to it:

  • nano /etc/httpd/conf/httpd.conf
  • Add this line: Listen 446

Step 6 – Restart services

  • service firewalld restart
  • service httpd restart
  • systemctl enable firewalld

That’s it, now go to http://yourdomain.com:446/valid8.php and you should see the following:

Dynportal Interface
Dynportal Interface

Why doesn’t my webphone/Viciphone work anymore?

webrtc installation

Why doesn’t my webphone/Viciphone work anymore?

UPDATE: October of 2023

There is a new issue since the evolution of the ViciPhone version 3 and CyburPhone version 3.2.5 that has been happening and I will go over how to solve it for everyone. The new feature in ViciDial that uses a settings container called “viciphone settings” has a setting by default that has the webphone dial its own extension which then gets you a result of a sound file telling you that “The number you have dialed is not in service”. The solution for this is simple, just need to change one line in the settings container as described below:

  1. Go into your Vicidial admin GUI
  2. Click on Admin and then Settings Containers
  3. Change the line that says “dialRegExten” from a 1 to a 0 as shown below

This will now fix your webphone. If you have any questions feel free to comment below or join our live support on Skype: https://join.skype.com/ujkQ7i5lV78O

2021 Issue Solution:

This article is to help those of you having problems with viciphone lately. It seems that googles stun server has reached end of life and no longer works correctly. You need to change the stun server to a different one. Here is a list of public stun servers:

Free Public STUN servers

https://gist.github.com/mondain/b0ec1cf5f60ae726202e

How do I change my STUN server for viciphone?

Good question, you need to edit your rtp.conf file for asterisk.

  • cd /etc/asterisk
  • nano rtp.conf
  • scroll down to the very bottom and change it to one on the list above

That’s it, youre done. If you have any problems or questions feel free to comment below.

I hope this helps.

-Chris aka Nox

How to – Scratch install Vicidial on CentOS 8

How to – Scratch install Vicidial on CentOS 8

This article will go over how to do a scratch install for Vicidial on CentOS 8. The majority of this was mapped out by Steve @ GenXoutsourcing. Thanks Steve

UPDATE: 6/13/21 -:- Special thanks to arx001 from the Vicidial Group Forums for helping me debug these instructions.

scratch install vicidial centos
sed -i 's/SELINUX=enforcing/SELINUX=disabled/g' /etc/selinux/config

Set Default Editor to nano:
yum -y install nano

nano /etc/bashrc

Then add this line at the bottom:
export EDITOR="nano"

timedatectl set-timezone America/New_York


rc.local not work:

chmod +x /etc/rc.d/rc.local
systemctl enable rc-local
systemctl start rc-local
systemctl status rc-local

yum check-update
yum -y install epel-release
reboot

yum update -y
reboot

yum groupinstall "Development Tools" -y

reboot

yum -y install https://dl.fedoraproject.org/pub/epel/epel-release-latest-8.noarch.rpm
yum -y install http://rpms.remirepo.net/enterprise/remi-release-8.rpm
yum -y install yum-utils
dnf module enable php:remi-7.4


sudo dnf install -y mariadb-server

sudo dnf -y install dnf-plugins-core
sudo dnf config-manager --set-enabled powertools


yum install -y php php-mcrypt php-cli php-gd php-curl php-mysql php-ldap php-zip php-fileinfo php-opcache wget unzip make patch gcc gcc-c++ subversion php php-devel php-gd gd-devel readline-devel php-mbstring php-mcrypt php-imap php-ldap php-mysql php-odbc php-pear php-xml php-xmlrpc curl curl-devel perl-libwww-perl ImageMagick libxml2 libxml2-devel httpd libpcap libpcap-devel libnet ncurses ncurses-devel screen kernel* mutt glibc.i686 certbot python3-certbot-apache mod_ssl openssl-devel newt-devel libxml2-devel kernel-devel sqlite-devel libuuid-devel sox sendmail lame-devel htop iftop perl-File-Which php-opcache libss7 mariadb-devel libss7* libopen* 

systemctl start mariadb
mysql_secure_installation
systemctl enable mariadb

systemctl stop mariadb
cp /etc/my.cnf /etc/my.cnf.original
echo "" > /etc/my.cnf

nano /etc/my.cnf ; copy the below config to this file.

####################################################################################################

[mysql.server]
user = mysql
#basedir = /var/lib

[client]
port = 3306
socket = /var/lib/mysql/mysql.sock

[mysqld]
datadir = /var/lib/mysql
#tmpdir = /home/mysql_tmp
socket = /var/lib/mysql/mysql.sock
user = mysql
old_passwords = 0
ft_min_word_len = 3
max_connections = 800
max_allowed_packet = 32M
skip-external-locking
sql_mode="NO_ENGINE_SUBSTITUTION"

log-error = /var/log/mysqld/mysqld.log

query-cache-type = 1
query-cache-size = 32M

long_query_time = 1
#slow_query_log = 1
#slow_query_log_file = /var/log/mysqld/slow-queries.log

tmp_table_size = 128M
table_cache = 1024

join_buffer_size = 1M
key_buffer = 512M
sort_buffer_size = 6M
read_buffer_size = 4M
read_rnd_buffer_size = 16M
myisam_sort_buffer_size = 64M

max_tmp_tables = 64

thread_cache_size = 8
thread_concurrency = 8

# If using replication, uncomment log-bin below
#log-bin = mysql-bin

[mysqldump]
quick
max_allowed_packet = 16M

[mysql]
no-auto-rehash

[isamchk]
key_buffer = 256M
sort_buffer_size = 256M
read_buffer = 2M
write_buffer = 2M

[myisamchk]
key_buffer = 256M
sort_buffer_size = 256M
read_buffer = 2M
write_buffer = 2M

[mysqlhotcopy]
interactive-timeout

[mysqld_safe]
#log-error = /var/log/mysqld/mysqld.log
#pid-file = /var/run/mysqld/mysqld.pid

####################################################################################################


mkdir /var/log/mysqld
touch /var/log/mysqld/slow-queries.log
chown -R mysql:mysql /var/log/mysqld
systemctl restart mariadb

####################################################################################################


Install the Perl Modules
yum install -y perl-CPAN perl-YAML perl-libwww-perl perl-DBI perl-DBD-MySQL perl-GD perl-Env perl-Term-ReadLine-Gnu perl-SelfLoader perl-open.noarch

cpan -i Tk String::CRC Tk::TableMatrix Net::Address::IP::Local Term::ReadLine::Gnu Spreadsheet::Read Net::Address::IPv4::Local RPM::Specfile Spreadsheet::XLSX Spreadsheet::ReadSXC MD5 Digest::MD5 Digest::SHA1 Bundle::CPAN Pod::Usage Getopt::Long DBI DBD::mysql Net::Telnet Time::HiRes Net::Server Mail::Sendmail Unicode::Map Jcode Spreadsheet::WriteExcel OLE::Storage_Lite Proc::ProcessTable IO::Scalar Scalar::Util Spreadsheet::ParseExcel Archive::Zip Compress::Raw::Zlib Spreadsheet::XLSX Test::Tester Spreadsheet::ReadSXC Text::CSV Test::NoWarnings Text::CSV_PP File::Temp Text::CSV_XS Spreadsheet::Read LWP::UserAgent HTML::Entities HTML::Strip HTML::FormatText HTML::TreeBuilder Switch Time::Local Mail::POP3Client Mail::IMAPClient Mail::Message IO::Socket::SSL readline

cd /usr/bin/
curl -LOk http://xrl.us/cpanm
chmod +x cpanm


cpanm -f File::HomeDir
cpanm -f File::Which
cpanm CPAN::Meta::Requirements
cpanm -f CPAN
cpanm YAML
cpanm MD5
cpanm Digest::MD5
cpanm Digest::SHA1
cpanm readline


cpanm Bundle::CPAN
cpanm DBI
cpanm -f DBD::mysql
cpanm Net::Telnet
cpanm Time::HiRes
cpanm Net::Server
cpanm Switch
cpanm Mail::Sendmail
cpanm Unicode::Map
cpanm Jcode
cpanm Spreadsheet::WriteExcel
cpanm OLE::Storage_Lite
cpanm Proc::ProcessTable
cpanm IO::Scalar
cpanm Spreadsheet::ParseExcel
cpanm Curses
cpanm Getopt::Long
cpanm Net::Domain
cpanm Term::ReadKey
cpanm Term::ANSIColor
cpanm Spreadsheet::XLSX
cpanm Spreadsheet::Read
cpanm LWP::UserAgent
cpanm HTML::Entities
cpanm HTML::Strip
cpanm HTML::FormatText
cpanm HTML::TreeBuilder
cpanm Time::Local
cpanm MIME::Decoder
cpanm Mail::POP3Client
cpanm Mail::IMAPClient
cpanm Mail::Message
cpanm IO::Socket::SSL
cpanm MIME::Base64
cpanm MIME::QuotedPrint
cpanm Crypt::Eksblowfish::Bcrypt
cpanm Crypt::RC4
cpanm Text::CSV
cpanm Text::CSV_XS

####################################################################################################


cd /usr/src
wget http://download.vicidial.com/required-apps/asterisk-perl-0.08.tar.gz
tar xzf asterisk-perl-0.08.tar.gz
cd asterisk-perl-0.08
perl Makefile.PL
make all
make install 

dnf --enablerepo=powertools install libsrtp-devel -y
yum install -y elfutils-libelf-devel libedit-devel

cd /usr/src
wget http://downloads.sourceforge.net/project/lame/lame/3.99/lame-3.99.5.tar.gz
tar -zxf lame-3.99.5.tar.gz
cd lame-3.99.5
./configure
make
make install

cd /usr/src/
wget https://digip.org/jansson/releases/jansson-2.13.tar.gz
tar xvzf jansson*
cd jansson-2.13
./configure
make clean
make
make install 
ldconfig

UPDATE: 6/22/21 - Ty @Ankit for catching the wrong directiory below 

cd /usr/src/
wget https://downloads.asterisk.org/pub/telephony/dahdi-linux-complete/dahdi-linux-complete-current.tar.gz
tar xzf dahdi*
cd /usr/src/dahdi-linux-complete-3.1.0+3.1.0/
nano /usr/src/dahdi-linux-complete-3.1.0+3.1.0/linux/include/dahdi/kernel.h
remove #include: </linux/pci-aspm.h>
make
make install
make install-config
(if you get an error here about 4.18.0-305.7.1.el8_4.x86_64 missing then do "yum install *4.18.0-305.7.1.el8_4.x86_64")

yum install dahdi-tools-libs

cd tools
make clean
make
make install
make install-config

if it gives an error /usr/sbin/dahdi_cfg -vvvvvvvvvvvvv 
edit the file "system.conf.sample" in "system.conf"


cd /usr/src/
wget http://downloads.asterisk.org/pub/telephony/libpri/libpri-1.6.0.tar.gz
tar xzf libpri-1.6.0.tar.gz
cd /usr/src/libpri-1.6.0
make clean
make
make install

nano  /etc/php.ini
error_reporting  =  E_ALL & ~E_NOTICE
memory_limit = 128M
short_open_tag = On
max_execution_time = 330
max_input_time = 360
post_max_size = 100M
upload_max_filesize = 42M
default_socket_timeout = 360
date.timezone = Europe/Rome

cd /usr/src/
wget http://download.vicidial.com/required-apps/asterisk-13.29.2-vici.tar.gz
tar xzf asterisk-13.29.2-vici.tar.gz
cd /usr/src/asterisk-13.29.2/
./configure --libdir=/usr/lib64 --with-pjproject-bundled -with-jansson-bundled
make clean
make menuselect    ; ####### select chan_meetme 
make
make install
make samples
make config


mkdir /usr/src/astguiclient
cd /usr/src/astguiclient
svn checkout svn://svn.eflo.net:3690/agc_2-X/trunk


mysql
SET GLOBAL connect_timeout=60;
CREATE DATABASE `asterisk` DEFAULT CHARACTER SET utf8 COLLATE utf8_unicode_ci;
CREATE USER 'cron'@'localhost' IDENTIFIED BY '1234';
GRANT SELECT,INSERT,UPDATE,DELETE,LOCK TABLES on asterisk.* TO cron@'%' IDENTIFIED BY '1234';
CREATE USER 'custom'@'localhost' IDENTIFIED BY 'custom1234';
GRANT SELECT,INSERT,UPDATE,DELETE,LOCK TABLES on asterisk.* TO custom@'%' IDENTIFIED BY 'custom1234';
GRANT SELECT,INSERT,UPDATE,DELETE,LOCK TABLES on asterisk.* TO cron@localhost IDENTIFIED BY '1234';
GRANT SELECT,INSERT,UPDATE,DELETE,LOCK TABLES on asterisk.* TO custom@localhost IDENTIFIED BY 'custom1234';
GRANT RELOAD ON *.* TO cron@'%';
GRANT RELOAD ON *.* TO cron@localhost;
GRANT RELOAD ON *.* TO custom@'%';
GRANT RELOAD ON *.* TO custom@localhost;
flush privileges;
use asterisk;
\. /usr/src/astguiclient/trunk/extras/MySQL_AST_CREATE_tables.sql
\. /usr/src/astguiclient/trunk/extras/first_server_install.sql
ALTER TABLE phones ALTER template_id SET DEFAULT '';
\. /usr/src/astguiclient/trunk/extras/sip-iax_phones.sql
quit

cd /usr/src/astguiclient/trunk
mkdir /usr/share/astguiclient
mkdir /var/log/astguiclient
mkdir /var/spool/asterisk/monitorDONE
perl install.pl

 Copy Asterisk Settings=Yes + Server webroot path=/var/www/html

####################################################################################################


/usr/share/astguiclient/ADMIN_area_code_populate.pl
/usr/share/astguiclient/ADMIN_update_server_ip.pl --old-server_ip=10.10.10.15

####################################################################################################


nano /etc/rc.local

### paste this below: 

#!/bin/sh
#
# This script will be executed *after* all the other init scripts.
# You can put your own initialization stuff in here if you don't
# want to do the full Sys V style init stuff.

touch /var/lock/subsys/local

# OPTIONAL enable ip_relay(for same-machine trunking and blind monitoring)
/usr/share/astguiclient/ip_relay/relay_control start 2>/dev/null 1>&2

# Disable console blanking and powersaving
/usr/bin/setterm -blank
/usr/bin/setterm -powersave off
/usr/bin/setterm -powerdown

### start up the MySQL server
systemctl restart mariadb.service

### start up the apache web server
systemctl restart apache2

### roll the Asterisk logs upon reboot
/usr/share/astguiclient/ADMIN_restart_roll_logs.pl

### clear the server-related records from the database
/usr/share/astguiclient/AST_reset_mysql_vars.pl

### load dahdi drivers
modprobe dahdi
/usr/sbin/dahdi_cfg -vvvvvvvvvvvvv

### sleep for 20 seconds before launching Asterisk
sleep 20

### start up asterisk
/usr/share/astguiclient/start_asterisk_boot.pl


####################################################################################################

crontab -e

### paste below:

### recording mixing/compressing/ftping scripts
#0,3,6,9,12,15,18,21,24,27,30,33,36,39,42,45,48,51,54,57 * * * * /usr/share/astguiclient/AST_CRON_audio_1_move_mix.pl
0,3,6,9,12,15,18,21,24,27,30,33,36,39,42,45,48,51,54,57 * * * * /usr/share/astguiclient/AST_CRON_audio_1_move_mix.pl --MIX
0,3,6,9,12,15,18,21,24,27,30,33,36,39,42,45,48,51,54,57 * * * * /usr/share/astguiclient/AST_CRON_audio_1_move_VDonly.pl
1,4,7,10,13,16,19,22,25,28,31,34,37,40,43,46,49,52,55,58 * * * * /usr/share/astguiclient/AST_CRON_audio_2_compress.pl --GSM
#2,5,8,11,14,17,20,23,26,29,32,35,38,41,44,47,50,53,56,59 * * * * /usr/share/astguiclient/AST_CRON_audio_3_ftp.pl --GSM

### keepalive script for astguiclient processes
* * * * * /usr/share/astguiclient/ADMIN_keepalive_ALL.pl --cu3way

### kill Hangup script for Asterisk updaters
* * * * * /usr/share/astguiclient/AST_manager_kill_hung_congested.pl

### updater for voicemail
* * * * * /usr/share/astguiclient/AST_vm_update.pl

### updater for conference validator
* * * * * /usr/share/astguiclient/AST_conf_update.pl

### flush queue DB table every hour for entries older than 1 hour
11 * * * * /usr/share/astguiclient/AST_flush_DBqueue.pl -q

### fix the vicidial_agent_log once every hour and the full day run at night
33 * * * * /usr/share/astguiclient/AST_cleanup_agent_log.pl
50 0 * * * /usr/share/astguiclient/AST_cleanup_agent_log.pl --last-24hours
## uncomment below if using QueueMetrics
#*/5 * * * * /usr/share/astguiclient/AST_cleanup_agent_log.pl --only-qm-live-call-check

## uncomment below if using Vtiger
#1 1 * * * /usr/share/astguiclient/Vtiger_optimize_all_tables.pl --quiet

### updater for VICIDIAL hopper
* * * * * /usr/share/astguiclient/AST_VDhopper.pl -q

### adjust the GMT offset for the leads in the vicidial_list table
1 1,7 * * * /usr/share/astguiclient/ADMIN_adjust_GMTnow_on_leads.pl --debug

### reset several temporary-info tables in the database
2 1 * * * /usr/share/astguiclient/AST_reset_mysql_vars.pl

### optimize the database tables within the asterisk database
3 1 * * * /usr/share/astguiclient/AST_DB_optimize.pl

## adjust time on the server with ntp
30 * * * * /usr/sbin/ntpdate -u pool.ntp.org 2>/dev/null 1>&2

### VICIDIAL agent time log weekly and daily summary report generation
2 0 * * 0 /usr/share/astguiclient/AST_agent_week.pl
22 0 * * * /usr/share/astguiclient/AST_agent_day.pl

### VICIDIAL campaign export scripts (OPTIONAL)
#32 0 * * * /usr/share/astguiclient/AST_VDsales_export.pl
#42 0 * * * /usr/share/astguiclient/AST_sourceID_summary_export.pl

### remove old recordings more than 7 days old
#24 0 * * * /usr/bin/find /var/spool/asterisk/monitorDONE -maxdepth 2 -type f -mtime +7 -print | xargs rm -f

### roll logs monthly on high-volume dialing systems
#30 1 1 * * /usr/share/astguiclient/ADMIN_archive_log_tables.pl

### remove old vicidial logs and asterisk logs more than 2 days old
28 0 * * * /usr/bin/find /var/log/astguiclient -maxdepth 1 -type f -mtime +2 -print | xargs rm -f
29 0 * * * /usr/bin/find /var/log/asterisk -maxdepth 3 -type f -mtime +2 -print | xargs rm -f
30 0 * * * /usr/bin/find / -maxdepth 1 -name "screenlog.0*" -mtime +4 -print | xargs rm -f

### cleanup of the scheduled callback records
25 0 * * * /usr/share/astguiclient/AST_DB_dead_cb_purge.pl --purge-non-cb -q

### GMT adjust script - uncomment to enable
#45 0 * * * /usr/share/astguiclient/ADMIN_adjust_GMTnow_on_leads.pl --list-settings

### Dialer Inventory Report
1 7 * * * /usr/share/astguiclient/AST_dialer_inventory_snapshot.pl -q --override-24hours

### inbound email parser
* * * * * /usr/share/astguiclient/AST_inbound_email_parser.pl


################ END PASTE HERE ####################


nano /etc/httpd/conf/httpd.conf

To disable logging, change:

CustomLog logs/access_log combined
        to this:
CustomLog /dev/null common

################

nano /etc/httpd/conf.d/record.conf

Alias /RECORDINGS/ "/var/spool/asterisk/monitorDONE/"

<Directory "/var/spool/asterisk/monitorDONE">
    Options Indexes MultiViews
    AllowOverride None
    Order allow,deny
    Allow from all
    Require all granted 
        <files *.mp3>
            Forcetype application/forcedownload
        </files>
</Directory>


################


for synchronization problems:

yourserverip/vicidial/admin.php
go to  Admin-> Servers-> update Asterisk Version: 13.29.2-vici
Or if you prefer the video version, watch our friend Harolds youtube

How to – Upgrade OpenSuSE from Leap 15.1 to 15.2 or 15.3

How to – Upgrade OpenSuSE from Leap 15.1 to 15.2 or 15.3

How to – Upgrade OpenSuSE from Leap 15.1 to 15.2 or 15.3 is what will be covered in this brief tutorial. Just change the 15.2 to 15.3 in any of the steps below to switch to 15.3 instead.

Step 1 – Preparing for upgrade by enabling the proper repository

zypper modifyrepo --enable openSUSE-Leap-15.1-Update
zypper ref
zypper up
vicibox9

Step 2 – Change existing repo’s for the others

This next part will change the repo’s to 15.2 and then we will start the fun part.

files="$(zypper lr -u | awk -F'|' '$4 ~ /Yes/ { gsub (" ", "", $2); r="/etc/zypp/repos.d/"$2".repo"; print r }')"
for f in $files
do
  echo "Backup of $f saved to /root/ before patching it up ..."
  cp -f "$f" /root/
  sed -i 's+/leap/15.1+/leap/$releasever+' "$f"
  sed -i 's+15.1.1+15.2+' "$f"
  sed -i 's+15.1+15.2+' "$f"
done

Step 3 – Update and reboot

zypper --releasever=15.2 ref
zypper --releasever=15.2 dup
reboot
vixibox9

If you have any problems, just comment here and I will help you out the best I can or you can drop by our Skype Group chat: https://join.skype.com/ujkQ7i5lV78O . Hope this helps a lot of you out there.

upgrade opensuse

]Make sure you copy mod_php7.conf to php7.confor the dynportal and audiostore conf files will cause apache to have errors. You can do so with the following command:

cp /etc/apache2/conf.d/mod_php7.conf /etc/apache2/conf.d/php7.conf

I hope this helps.

-Nox

How to – Secure Vicidial, correctly. Part 1

secure vicidial

How to – Secure Vicidial, correctly. Part 1

This article will show you how to secure Vicidial server correctly. This is definitely one of the topics, that I am asked about the most, so with that being said, this will be a multipart series with different “layers” of security from the basic way you need to secure your system in todays remote world, and as advanced as encrypted passwords, recordings, two factor authentication and more.

secure vicidial
Securing Vicidial

The steps I will cover in this article, will be the steps to take once you have finished installing a fresh Vicidial server. It will cover a single server setup, not a cluster which requires some additional steps to be shown later on in this series. This article will also presume you are setting this up for remote access, not just local. Let’s get started.


Secure Vicidial

Step 1 – Setup access through YAST firewall.

At the Linux CLI, type “yast firewall” and the following screen will pop up:

secure vicidial

Go down to “Interfaces” and select your NIC card that has WAN access and change the zone from default to public:

Change default zone to public

Then TAB over to the public zone and remove all entries but apache2-ssl and ssh, then add viciportal-ssl.

Public Zone services to allow

Finally, add these services to your “Trusted” zone and TAB over to [Accept] and press enter.

Trusted Zone services to allow

This completes the first step for securing your Vicidial server’s firewall access.


Step 2 – Granting access for Dynamic portal & IP whitelist access only through the VB-firewall crontab entry

The next thing you need to do is change the crontab entry from blacklist being blocked to whitelist and dynamic access only. To do so, type “crontab -e” at your Linux CLI and you should see the following:

crontab -e

“Page down” until you see the VB-firewall entries near the bottom and change them as you see below:

Make the changes you see above and press cntl+X to save and follow the prompts to save it.

Ok, so these steps above will prepare your server for the next steps of this process which I have written in other articles already, but I will link them here for easy navigation.


Step 3 – Enabling IP Whitelist

You can follow my blog post about IP whitelist, here.


Step 4 – Setting up the dynamic portal

You can follow the article for these instructions, here.

Dynportal
Dynportal

Well, that’s it for part 1, you have now setup your system for secure remote access to your server through IP whitelist & dynamic portal only. As always, feel free to comment below with any questions or issues you have along the way. My team and I are always available to help our Vicidial community secure themselves against the threats todays world comes with such as BazarCall malware, Ryuk and Conti Ransomwares and other cyber threats that directly target the telecommunications industry. Please protect yourself accordingly, if you need help with this, please fill out the form below for a FREE security audit or if you need some technical assistance on your servers.


Well, that’s it from us here at CyburDial for today, but please stay tuned for Part 2 of this series which will cover adding in other servers for a cluster type environment and how to allow access only to certain services on each server that are needed for communication between the cluster such as MySQL.

I hope this helps.

-Nox

How to – Scratch install instructions for Vicidial on OpenSuSE Leap 15.3 with Asterisk 16.17.0

Install Asterisk 16 on Vicidial

How to – Scratch install instructions for Vicidial on OpenSuSE Leap 15.3 with Asterisk 16.17.0

So, I have decided to write up a scratch install instructions for Vicidial on OpenSuSE Leap 15.3 with Asterisk 16.17-0 instead of Asterisk 13 and wanted to share the instructions step by step. I have not tested this yet.

zypper ar http://download.opensuse.org/distribution/leap/15.3/repo/oss/ openSUSE-Leap-15.3-Oss
zypper ar http://download.opensuse.org/repositories/devel:/languages:/perl/openSUSE_Leap_15.3/ openSUSE-Leap-15.3-PERL
zypper ar http://download.opensuse.org/repositories/server:/php:/applications/openSUSE_Leap_15.3/ openSUSE-Leap-15.3-PHP-Applications
zypper ar http://download.opensuse.org/update/leap/15.3/oss/ openSUSE-Leap-15.3-Update
zypper ar https://download.opensuse.org/repositories/home:vicidial:asterisk-13/openSUSE_Leap_15.3/home:vicidial:asterisk-13.repo
zypper ar https://download.opensuse.org/repositories/home:/vicidial/openSUSE_Leap_15.3/home:vicidial.repo
zypper ar https://download.opensuse.org/repositories/home:/vicidial:/vicibox/openSUSE_Leap_15.3/home:vicidial:vicibox.repo
zypper ar https://download.opensuse.org/repositories/home:/zippy:/jx:/packages-ready/openSUSE_Leap_15.3/ home_zippy_jx_packages-ready
zypper addrepo https://download.opensuse.org/repositories/devel:languages:python:Factory/openSUSE_Leap_15.3/devel:languages:python:Factory.repo


zypper ref
zypper up
zypper in dahdi*
zypper in libpri*
zypper in libedit*
zypper in net-snmp*
zypper in libjansson4*

zypper install sqlite3-devel mariadb-server mariadb make patch gcc gcc-c++ subversion php php-devel php-gd gd-devel php-mbstring php-mcrypt php-imap php-ldap php-mysql php-odbc php-pear php-xml php-xmlrpc curl curl-devel perl-libwww-perl ImageMagick libxml2 libxml2-devel httpd libpcap libpcap-devel libnet ncurses ncurses-devel screen mysql-devel ntp mutt wget nano unzip sipsak sox libuuid-devel httpd php-common php-pdo mod_ssl perl-DBI perl-DBD-MySQL perl-Digest-HMAC perl-YAML perl-ExtUtils-ParseXS perl-NetAddr-IP perl-Crypt-SSLeay perl-Curses perl-DBD-Pg perl-Module-ScanDeps perl-Text-CSV perl-HTML-Template perl-IO-Compress perl-Text-Glob perl-Jcode perl-Test-Script perl-Archive-Tar perl-Test-Base perl-OLE-Storage_Lite perl-Archive-Zip perl-Net-Server perl-Convert-ASN1 perl perl-Compress-Raw-Zlib perl-Digest-SHA1 perl-Data-Dumper perl-Error perl-ExtUtils-CBuilder perl-Test-Tester perl-Parse-RecDescent perl-Spiffy perl-IO-Zlib perl-Module-Build perl-HTML-Parser perl-Net-SSLeay perl-Proc-ProcessTable perl-TermReadKey perl-Term-ReadLine-Gnu perl-Digest-SHA perl-Tk perl-Net-SNMP perl-Test-NoWarnings perl-XML-Writer perl-Proc-PID-File perl-Compress-Raw-Bzip2 perl-libwww-perl perl-XML-Parser perl-File-Remove perl-Parse-CPAN-Meta perl-Set-Scalar perl-Probe-Perl perl-File-Which perl-Package-Constants perl-Module-Install perl-File-HomeDir perl-Spreadsheet-ParseExcel perl-Mail-Sendmail perl-Spreadsheet-XLSX asterisk-perl perl-version perl-Crypt-DES perl-URI perl-Net-Daemon perl-IO-stringy perl-YAML-Tiny perl-HTML-Tagset perl-Socket6 perl-BSD-Resource perl-IPC-Run3 perl-Text-CSV_XS perl-Unicode-Map perl-Net-Telnet perl-PAR-Dist perl-Date-Manip perl-JSON perl-rrdtool lame screen iftop htop perl-GD gcc gcc-c++- bzip2 make libjansson-devel dahdi-linux-devel libxml2-tools libxml2-2 libxml2-devel libuuid-devel sqlite3-devel


perl -MCPAN -e 'my $c = "CPAN::HandleConfig"; $c->load(doit => 1, autoconfig => 1); $c->edit(prerequisites_policy => "follow"); $c->edit(build_requires_install_policy => "yes"); $c->commit'

cpan -i String::CRC Tk::TableMatrix Net::Address::IP::Local Term::ReadLine::Gnu Spreadsheet::Read Net::Address::IPv4::Local RPM::Specfile Spreadsheet::XLSX Spreadsheet::ReadSXC MD5 Digest::MD5 Digest::SHA1 Bundle::CPAN Pod::Usage Getopt::Long DBI DBD::mysql Net::Telnet Time::HiRes Net::Server Mail::Sendmail Unicode::Map Jcode Spreadsheet::WriteExcel OLE::Storage_Lite Proc::ProcessTable IO::Scalar Scalar::Util Spreadsheet::ParseExcel Archive::Zip Compress::Raw::Zlib Spreadsheet::XLSX Test::Tester Spreadsheet::ReadSXC Text::CSV Test::NoWarnings Text::CSV_PP File::Temp Text::CSV_XS Spreadsheet::Read LWP::UserAgent HTML::Entities HTML::Strip HTML::FormatText HTML::TreeBuilder Switch Time::Local MIME::POP3Client Mail::IMAPClient Mail::Message IO::Socket::SSL readline 

cd /usr/bin/
curl -LOk http://xrl.us/cpanm
chmod +x cpanm
cpanm -f File::Which
cpanm -f File::HomeDir
cpanm CPAN::Meta::Requirements
cpanm -f CPAN
cpanm -f DBD::mysql
cpanm User::Identity --force
cpanm YAML MD5 Digest::MD5 Digest::SHA1 Curses Getopt::Long Net::Domain Term::ReadKey Term::ANSIColor HTML::FormatText MIME::Decoder Mail::POP3Client Mail::Message Crypt::Eksblowfish::Bcrypt

### Make Swap ###
mkdir -p /var/lib/swap
dd if=/dev/zero of=/var/lib/swap/swapfile bs=4G count=4096
mkswap /var/lib/swap/swapfile
swapon /var/lib/swap/swapfile
cat /proc/swaps
nano /etc/fstab
paste this: /var/lib/swap/swapfile swap swap defaults 0 0
save and exit

### Create DB & Cron user
mysql
CREATE DATABASE `asterisk` DEFAULT CHARACTER SET utf8 COLLATE utf8_unicode_ci;
CREATE USER 'cron'@'localhost' IDENTIFIED BY '1234';
GRANT SELECT,INSERT,UPDATE,DELETE,LOCK TABLES on asterisk.* TO cron@'%' IDENTIFIED BY '1234';
GRANT SELECT,INSERT,UPDATE,DELETE,LOCK TABLES on asterisk.* TO cron@localhost IDENTIFIED BY '1234';
GRANT RELOAD ON *.* TO cron@'%';
GRANT RELOAD ON *.* TO cron@localhost;
flush privileges;
exit

### Install Asterisk 16 ###
mkdir /usr/src/asterisk
wget http://download.vicidial.com/beta-apps/asterisk-16.17.0-vici.tar.gz
tar -xzvf asterisk-16.17.0-vici.tar.gz
./configure --libdir=/usr/lib64 --with-pjproject-bundled -with-jansson-bundled
rm menuselect.makeopts
make menuselect*
**** Go down one to applications and hit enter, go down until you find the "meetme" app and press space bar, then hit "X" ****
make && make install && make samples && make config && make basic-pbx
/usr/share/astguiclient/start_asterisk_boot.pl

mkdir /usr/src/astguiclient
cd /usr/src/astguiclient
svn checkout svn://svn.eflo.net:3690/agc_2-X/trunk

mysql
SET GLOBAL connect_timeout=60;
use asterisk;
\. /usr/src/astguiclient/trunk/extras/MySQL_AST_CREATE_tables.sql
\. /usr/src/astguiclient/trunk/extras/first_server_install.sql
ALTER TABLE phones ALTER template_id SET DEFAULT '';
\. /usr/src/astguiclient/trunk/extras/sip-iax_phones.sql
quit

/usr/src/astguiclient/trunk/install.pl
/usr/share/astguiclient/ADMIN_area_code_populate.pl
/usr/src/astguiclient/trunk/bin/ADMIN_update_server_ip.pl

nano /etc/rc.local

### paste this below: 

#!/bin/sh
#
# This script will be executed *after* all the other init scripts.
# You can put your own initialization stuff in here if you don't
# want to do the full Sys V style init stuff.

touch /var/lock/subsys/local

# OPTIONAL enable ip_relay(for same-machine trunking and blind monitoring)
/usr/share/astguiclient/ip_relay/relay_control start 2>/dev/null 1>&2

# Disable console blanking and powersaving
/usr/bin/setterm -blank
/usr/bin/setterm -powersave off
/usr/bin/setterm -powerdown

### start up the MySQL server
systemctl start mariadb.service
systemctl enable mariadb.service

### start up the apache web server
systemctl start apache2
systemctl enable apache2

### roll the Asterisk logs upon reboot
/usr/share/astguiclient/ADMIN_restart_roll_logs.pl

### clear the server-related records from the database
/usr/share/astguiclient/AST_reset_mysql_vars.pl

### load dahdi drivers
modprobe dahdi
/usr/sbin/dahdi_cfg -vvvvvvvvvvvvv

### sleep for 20 seconds before launching Asterisk
sleep 20

### start up asterisk
/usr/share/astguiclient/start_asterisk_boot.pl


############## END PASTE HERE ##################


crontab -e

### paste below:

### recording mixing/compressing/ftping scripts
#0,3,6,9,12,15,18,21,24,27,30,33,36,39,42,45,48,51,54,57 * * * * /usr/share/astguiclient/AST_CRON_audio_1_move_mix.pl
0,3,6,9,12,15,18,21,24,27,30,33,36,39,42,45,48,51,54,57 * * * * /usr/share/astguiclient/AST_CRON_audio_1_move_mix.pl --MIX
0,3,6,9,12,15,18,21,24,27,30,33,36,39,42,45,48,51,54,57 * * * * /usr/share/astguiclient/AST_CRON_audio_1_move_VDonly.pl
1,4,7,10,13,16,19,22,25,28,31,34,37,40,43,46,49,52,55,58 * * * * /usr/share/astguiclient/AST_CRON_audio_2_compress.pl --GSM
#2,5,8,11,14,17,20,23,26,29,32,35,38,41,44,47,50,53,56,59 * * * * /usr/share/astguiclient/AST_CRON_audio_3_ftp.pl --GSM

### keepalive script for astguiclient processes
* * * * * /usr/share/astguiclient/ADMIN_keepalive_ALL.pl --cu3way

### kill Hangup script for Asterisk updaters
* * * * * /usr/share/astguiclient/AST_manager_kill_hung_congested.pl

### updater for voicemail
* * * * * /usr/share/astguiclient/AST_vm_update.pl

### updater for conference validator
* * * * * /usr/share/astguiclient/AST_conf_update.pl

### flush queue DB table every hour for entries older than 1 hour
11 * * * * /usr/share/astguiclient/AST_flush_DBqueue.pl -q

### fix the vicidial_agent_log once every hour and the full day run at night
33 * * * * /usr/share/astguiclient/AST_cleanup_agent_log.pl
50 0 * * * /usr/share/astguiclient/AST_cleanup_agent_log.pl --last-24hours
## uncomment below if using QueueMetrics
#*/5 * * * * /usr/share/astguiclient/AST_cleanup_agent_log.pl --only-qm-live-call-check

## uncomment below if using Vtiger
#1 1 * * * /usr/share/astguiclient/Vtiger_optimize_all_tables.pl --quiet

### updater for VICIDIAL hopper
* * * * * /usr/share/astguiclient/AST_VDhopper.pl -q

### adjust the GMT offset for the leads in the vicidial_list table
1 1,7 * * * /usr/share/astguiclient/ADMIN_adjust_GMTnow_on_leads.pl --debug

### reset several temporary-info tables in the database
2 1 * * * /usr/share/astguiclient/AST_reset_mysql_vars.pl

### optimize the database tables within the asterisk database
3 1 * * * /usr/share/astguiclient/AST_DB_optimize.pl

## adjust time on the server with ntp
30 * * * * /usr/sbin/ntpdate -u pool.ntp.org 2>/dev/null 1>&2

### VICIDIAL agent time log weekly and daily summary report generation
2 0 * * 0 /usr/share/astguiclient/AST_agent_week.pl
22 0 * * * /usr/share/astguiclient/AST_agent_day.pl

### VICIDIAL campaign export scripts (OPTIONAL)
#32 0 * * * /usr/share/astguiclient/AST_VDsales_export.pl
#42 0 * * * /usr/share/astguiclient/AST_sourceID_summary_export.pl

### remove old recordings more than 7 days old
#24 0 * * * /usr/bin/find /var/spool/asterisk/monitorDONE -maxdepth 2 -type f -mtime +7 -print | xargs rm -f

### roll logs monthly on high-volume dialing systems
#30 1 1 * * /usr/share/astguiclient/ADMIN_archive_log_tables.pl

### remove old vicidial logs and asterisk logs more than 2 days old
28 0 * * * /usr/bin/find /var/log/astguiclient -maxdepth 1 -type f -mtime +2 -print | xargs rm -f
29 0 * * * /usr/bin/find /var/log/asterisk -maxdepth 3 -type f -mtime +2 -print | xargs rm -f
30 0 * * * /usr/bin/find / -maxdepth 1 -name "screenlog.0*" -mtime +4 -print | xargs rm -f

### cleanup of the scheduled callback records
25 0 * * * /usr/share/astguiclient/AST_DB_dead_cb_purge.pl --purge-non-cb -q

### GMT adjust script - uncomment to enable
#45 0 * * * /usr/share/astguiclient/ADMIN_adjust_GMTnow_on_leads.pl --list-settings

### Dialer Inventory Report
1 7 * * * /usr/share/astguiclient/AST_dialer_inventory_snapshot.pl -q --override-24hours

### inbound email parser
* * * * * /usr/share/astguiclient/AST_inbound_email_parser.pl


################ END PASTE HERE ####################

a2enmod ssl
a2enflag SSL

reboot

go to http://127.0.0.1/vicidial/admin.php


Enjoy!!

-CarpeNox

BazarLoader used to deploy Ryuk ransomware on high-value targets

BazarLoader

BazarLoader used to deploy Ryuk ransomware on high-value targets

Trojan Horse malware

The TrickBot gang operators are increasingly targeting high-value targets with the new stealthy BazarLoader trojan before deploying the Ryuk ransomware.

For years, the TrickBot gang has been using their trojan to compromise enterprise networks by downloading different software modules used for specific behavior such as stealing passwordsspreading to other machines, or even stealing a domain’s Active Directory database.

As these modules have become heavily analyzed over time, security solutions have become better at detecting these modules before being utilized.

From TrickBot to BazarLoader

In April 2020, bleepingcomputer reported that the TrickBot gang had started to use a new BazarLoader/BazarBackdoor infection in phishing attacks.

In a new report, Advanced Intel security researchers explain that instead of burning victims with the highly-detected TrickBot trojan, threat actors now favor BazarBackdoor as their tool of choice for high-value enterprise targets.

“BazarBackdoor remains the covert malware relying upon minimal functionality while on the host producing high-value long-term infections due to its simplicity and external operation dependency to exploit more information later.”

“In other words, the BazarBackdoor “blending-in“ simplicity and obfuscation layer allows the payload to be a better choice for high-value targets,” Kremez told BleepingComputer in a conversation about their report.

A BazarLoader compromise starts with a targeted phishing attack, as shown by a phishing email received by BleepingComputer in April.

BazarLoader phishing attack

After infecting a computer, BazarLoader will use process hollowing to inject the BazarBackdoor component into legitimate Windows processes such as cmd.exe, explorer.exe, and svchost.exe. A scheduled task is created to load BazarLoader every time a user logs into the system.

BazarLoader scheduled task

Eventually, BazarBackdoor will deploy a Cobalt Strike beacon, which provides remote access to threat actors who install post-exploitation tools such as BloodHound and Lasagne for mapping a Windows domain and extracting credentials.

Ultimately, the attack leads to threat actors deploying Ryuk ransomware on the entire network and demand massive ransoms.

BazarBackdoor attack flow
Source: Advanced Intel

Even with this increase in utilization, as BazarBackdoor requires a more significant amount of human-operation, Kremez believes that BazarLoader will be reserved for select targets.

“The downside of hunting with BazarBackdoor is that it requires an expensive exploitation operation to pivot from the infections,” Kremez explained.

For mass-distribution, we should continue to see TrickBot utilized for network compromise.


Check out our FREE security audit to see if you are a victim.

What is BazarCall malware?

BazarCall

What is BazarCall malware?

Answer: Malware targeting VoIP servers. Read on.

For the past two months, security researchers have been waging an online battle against a new ‘BazarCall’ malware that uses call centers to distribute some of the most damaging Windows malware.

The new malware was discovered being distributed by call centers in late January and is named BazarCall, or BazarCall, as the threat actors initially used it to install the BazarLoader malware.

While other malware is now being distributed, researchers continue to identify the distribution campaign as BazarCall.

Like many malware campaigns, BazarCall starts with a phishing email but from there deviates to a novel distribution method – using phone call centers to distribute malicious Excel documents that install malware.

Instead of bundling attachments with the email, BazarCall emails prompt users to call a phone number to cancel a subscription before they are automatically charged. These call centers would then direct users to a specially crafted website to download a “cancellation form” that installs the BazarCall malware.

BazarCall: From phishing emails to call centers

BazarCall attacks all start with a phishing email targeting corporate users that state the recipient’s free trial is about to run out. However, these emails do not provide any details regarding the alleged subscription.

The emails then prompt the user to contact a listed phone number to cancel the subscription before they are charged $69.99 to $89.99 for a renewal, as shown in the example BazarCall phishing email below.

Example BazarCall email

While the bulk of the emails seen by BleepingComputer have been from a fictitious company named “Medical reminder service, Inc.”, the emails have also used other fake company names such as ‘iMed Service, Inc.’, ‘Blue Cart Service, Inc.’, and ‘iMers, Inc.’  

These emails all use similar subjects such as “Thank you for using your free trial” or “Your free trial period is almost over!” Security researcher ExecuteMalware has compiled a more extensive list of email subjects used by this attack.

When a recipient calls the listed phone number, they will be placed on a short hold and then be greeted by a live person. When asked for more information or how to cancel the subscription, the call center agent asks the victim for a unique customer ID enclosed in the email.

Randy Pargman, Vice President of Threat Hunting & Counterintelligence at Binary Defense, told BleepingComputer that this unique customer ID is a core component of the attack and is used by the call center to determine if the caller is a targeted victim.

“They will be able to identify the company that got that email when you give them a valid customer number on the phone. But if you give them a wrong number they will just tell you that they canceled your order and it’s all good without sending you to the website,” Pargman told BleepingComputer in a conversation about BazarCall.

If a correct customer ID is given, the call center agent will direct the user to a fake website that pretends to be the associated medical services company. The phone agent will stay on the phone with the victim and guide them to a cancellation page where they are prompted to enter their customer ID, as shown below.

BazarCall distribution site
Source: Brad Duncan

When the user enters their customer ID number, the website will automatically prompt the browser to download an Excel document (xls or xlsb). The call center agent will then help the victim open the file and clicking on the ‘Enable Content’ button to enable malicious macros.

In some calls conducted by Pargman, the threat actors instructed him to disable antivirus to prevent the malicious documents from being detected.

Malicious BazarCall Excel document

When the Excel macros are enabled, the BazarCall malware will be downloaded and executed on the victim’s computer.

When the BazarCall campaign first started, it was used to distribute the BazarLoader malware but has also begun distributing TrickBot, IcedID, Gozi IFSB, and other malware. 

These Windows infections are particularly dangerous as they provide remote access to compromised corporate networks where the threat actors spread laterally through the network to steal data or deploy ransomware.

Threat actors use BazarLoader and Trickbot to deploy the Ryuk or Conti ransomware, while IcedID has been used in the past to deploy the now-defunct Maze and Egregor ransomware infections.

Security researcher Brad Duncan has shared a video illustrating a call into the threat actor’s call center and its distribution of malicious documents to unsuspecting victims. https://www.youtube.com/embed/uAkeXCYcl4Y

BazarCall: Deployed via a Distribution-as-a-Service

While BazarLoader and the TrickBot infections are believed to be created by the same ‘TrickBot’ hacking group, the other distributed infections are not related to these threat actors.

Due to this, Pargman has told BleepingComputer that he believes that another threat actor group is running the call centers and renting out distribution as a Distribution-as-a-Service.

“My belief is that this is a distro as a service and that UNC1878 is probably a customer of theirs,” Pargman explained.

This belief is echoed by Cryptolaemus security researcher Joseph Roosen who told BleepingComputer that the distribution service is run like a regular company, keeping strict Monday through Friday business hours.

BleepingComputer’s efforts to contact the call center over the past four days have been unsuccessful due to the constantly changing infrastructure used by the threat actors.

Due to the efforts of researchers such as Pargman, Roosen, Duncan, William Thomas of Cyjax, TheAnalyst, and ExecuteMalware, and many others, the distribution service has been forced to constantly change their phone numbers and hosting sites as the researchers take them down. 

Unfortunately, even with the cybersecurity community’s combined efforts, this distribution method has been very successful.

Due to their distribution method, malware samples commonly have very low detection rates on VirusTotal as they are not publicly distributed and detected by antivirus vendors.

Furthermore, from emails seen by BleepingComputer, people are falling for this scam as they believe they are legitimate subscriptions that need to be canceled.


For this reason, we here at Cyburity would like to offer our services free of charge to anyone effected by this malware, BazarCall so we can track down their command centers and disable them as well as remediate any threat actors from your server. If you have been affected or would like to have a free security audit to see if you have been, please schedule a FREE security audit. By working together, we can break down these hacking groups to make it where they move on from this scam to something else…..because they will.

-Nox